Digital sculpting roadmap
How to Learn Blender Sculpting from Scratch
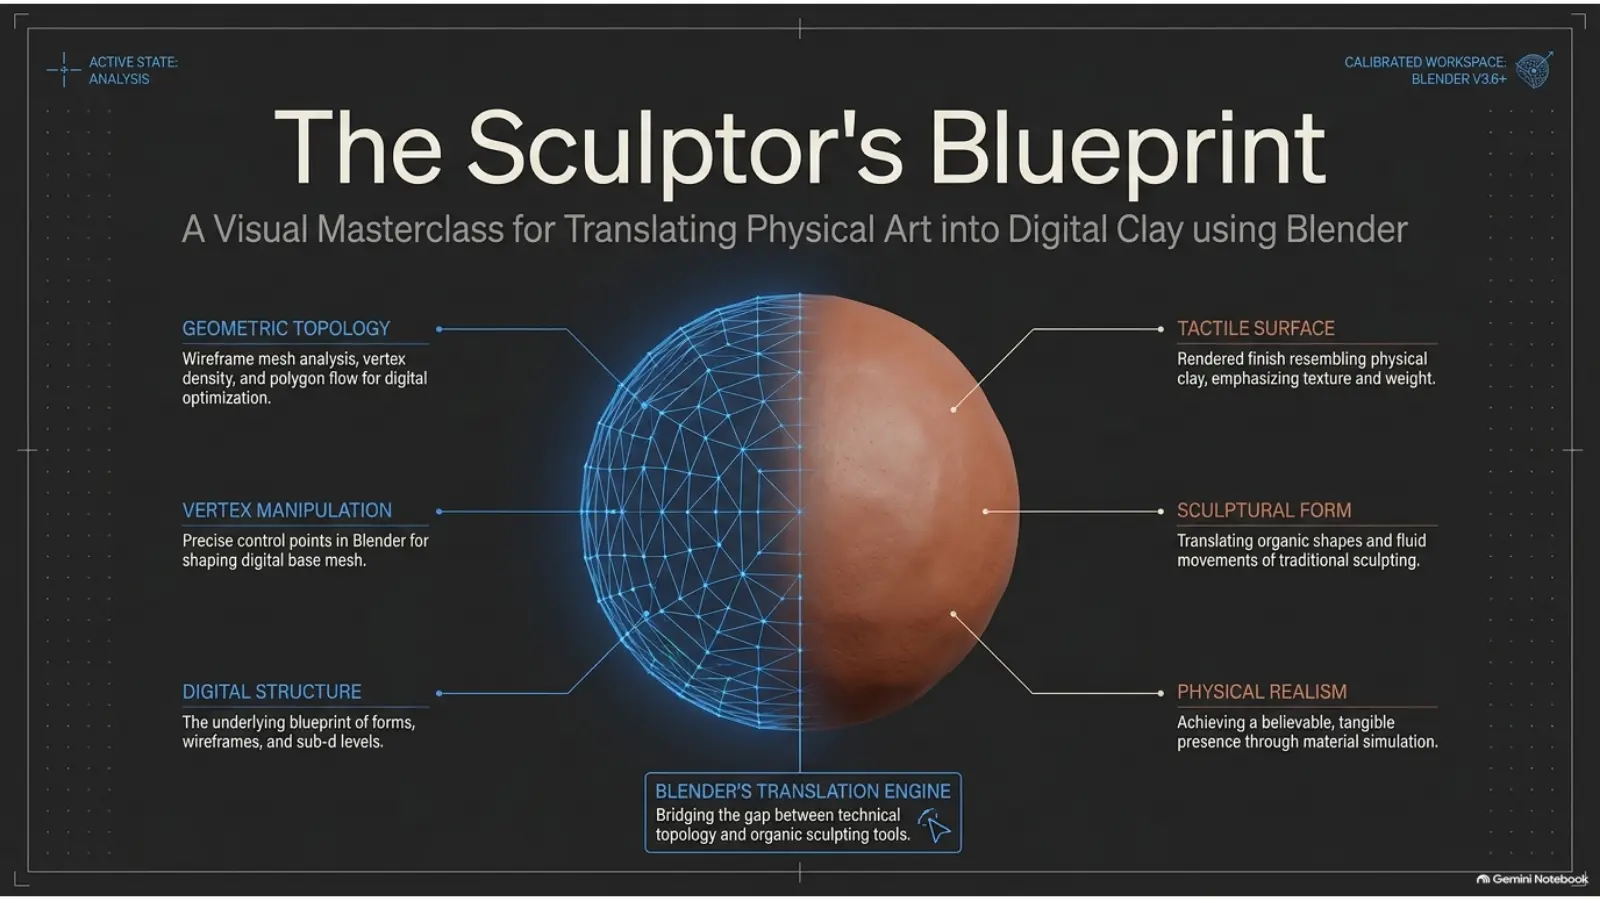
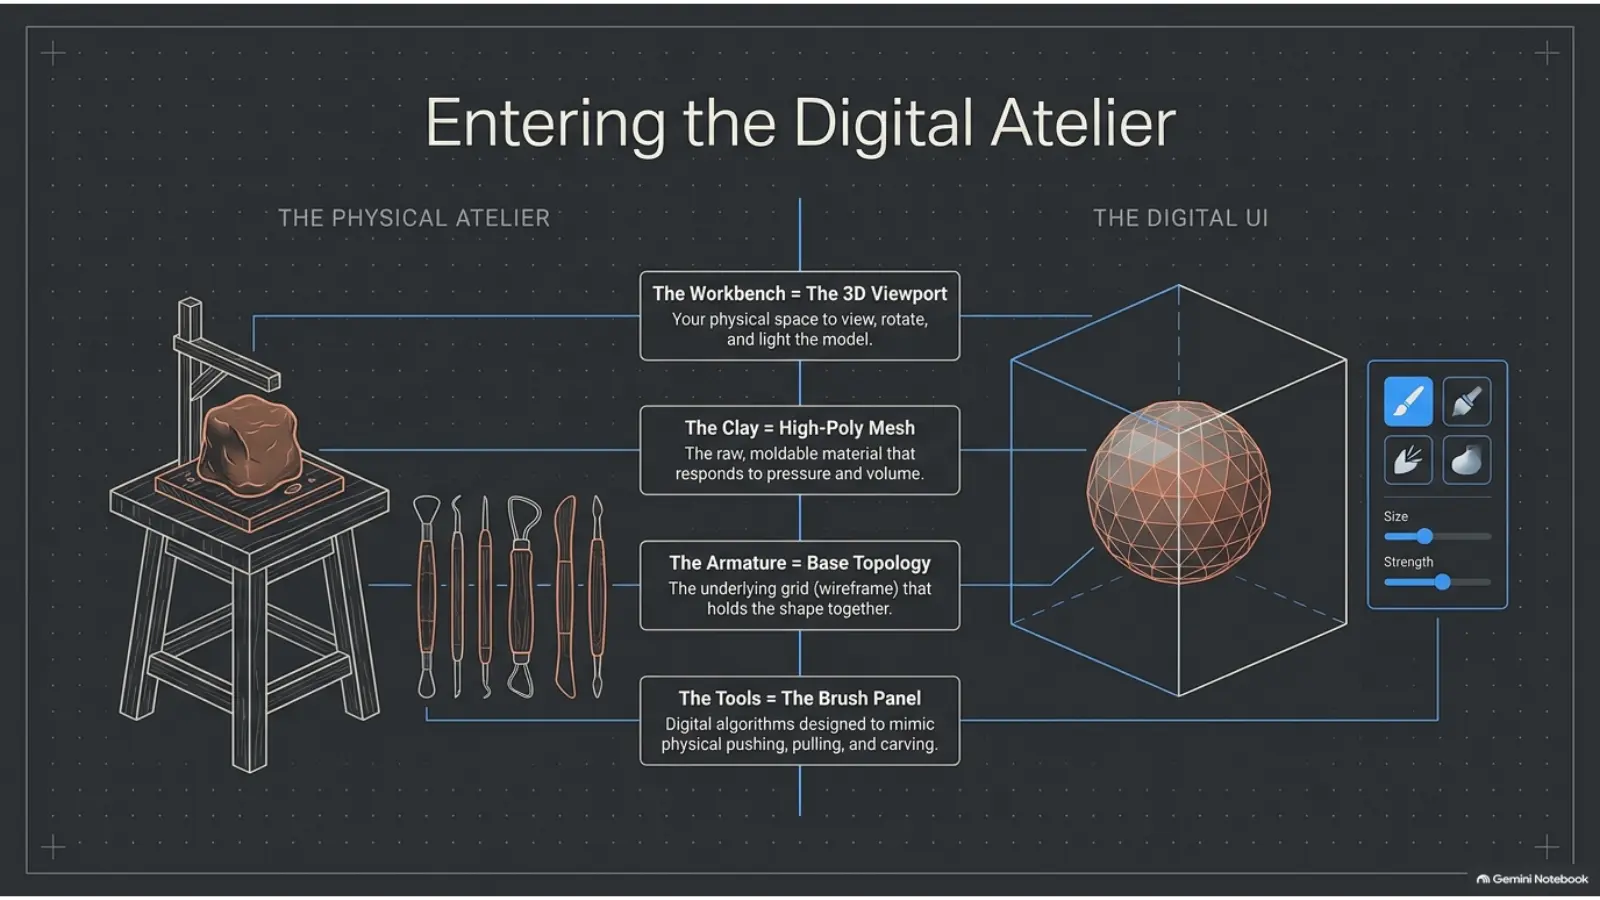
Learning Blender sculpting is easier when you stop treating the software as a list of buttons and start treating it like a digital atelier. The 3D Viewport becomes your workbench, the high-poly mesh becomes clay, topology becomes the armature, and brushes become tools for pushing, pulling, carving and refining form.
This guide turns that idea into a practical learning path. You will learn what hardware matters, why low-poly meshes stretch, how to group brushes by intent, when to use Remesh or Dyntopo, how to protect thin geometry, and how to finish a sculpt with color and material setup. The goal is simple: stop fighting a cube and start shaping digital clay with a repeatable system.
On this page
The digital atelier roadmap
A beginner does not need every Blender tool at once. Start by mapping traditional sculpting ideas to Blender's interface: the viewport is where you turn the model, the mesh is your clay, base topology holds the form together, and the brush panel is a set of algorithms that imitate physical sculpting actions.
If the interface still feels unfamiliar, read Blender Interface Basics for Sculpting first. If Blender 4.3 feels cramped because of the Asset Browser workflow, use the classic sculpting UI setup guide before you start long practice sessions.
Digital clay: stop fighting the cube
Many beginners enter Blender dreaming about a huge dragon and leave with something that looks like a crumpled potato. That is not proof of missing talent. It is usually proof of a missing system. A beginner fights polygons; a sculptor makes them flow. The secret is not knowing more buttons, but understanding how cold geometry becomes a responsive mass.
Keep this section as the mental checklist while you use the media below. Each slide explains one part of the same system: hardware, mesh density, navigation, brush intent, symmetry, topology and final color.
Hardware and stroke control
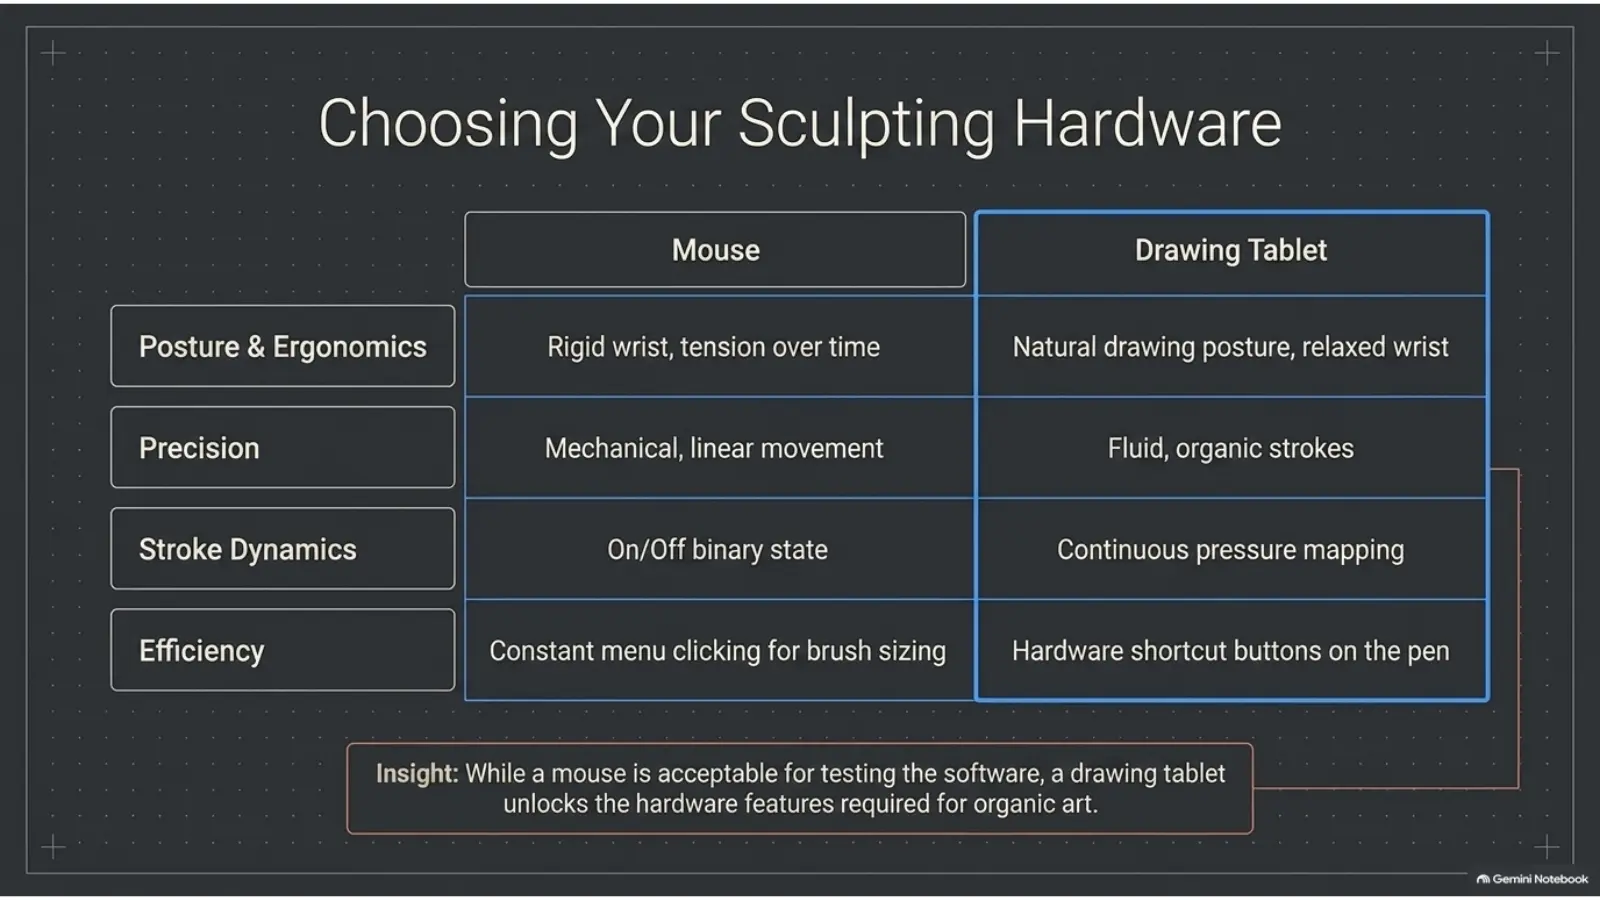
You can test Sculpt Mode with a mouse, but a drawing tablet makes organic sculpting much easier. Trying to sculpt with a mouse is like trying to draw a portrait with a brick: possible in theory, painful in practice. The main advantage is pressure sensitivity: the pen can control radius and strength as you press harder or softer. That creates tapered strokes, smoother buildup and more natural clay behavior.
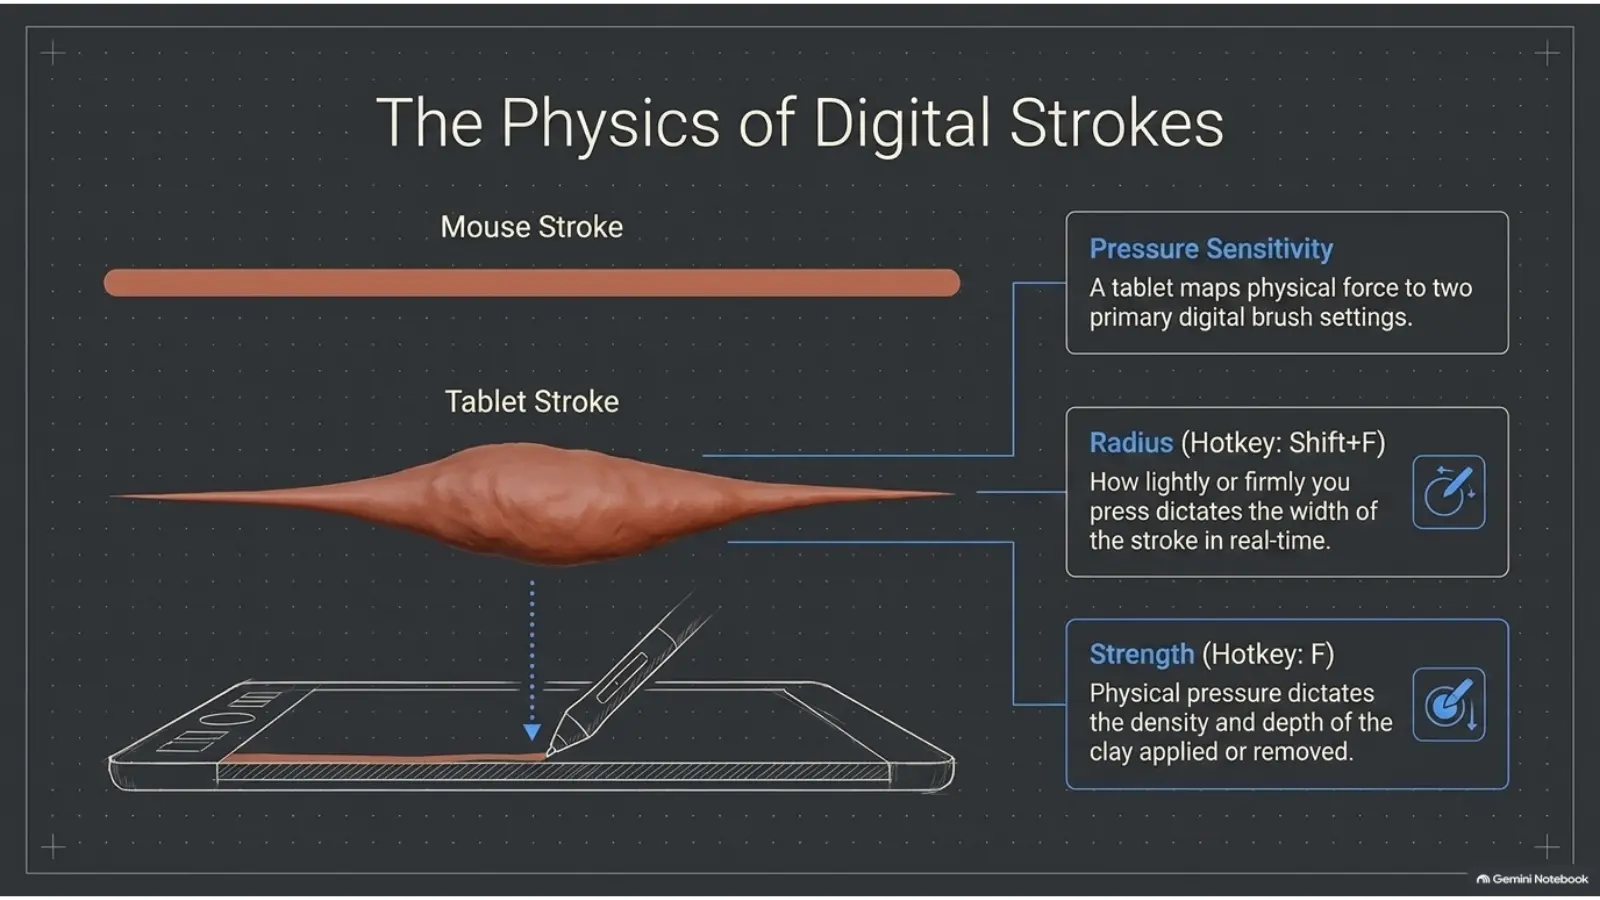
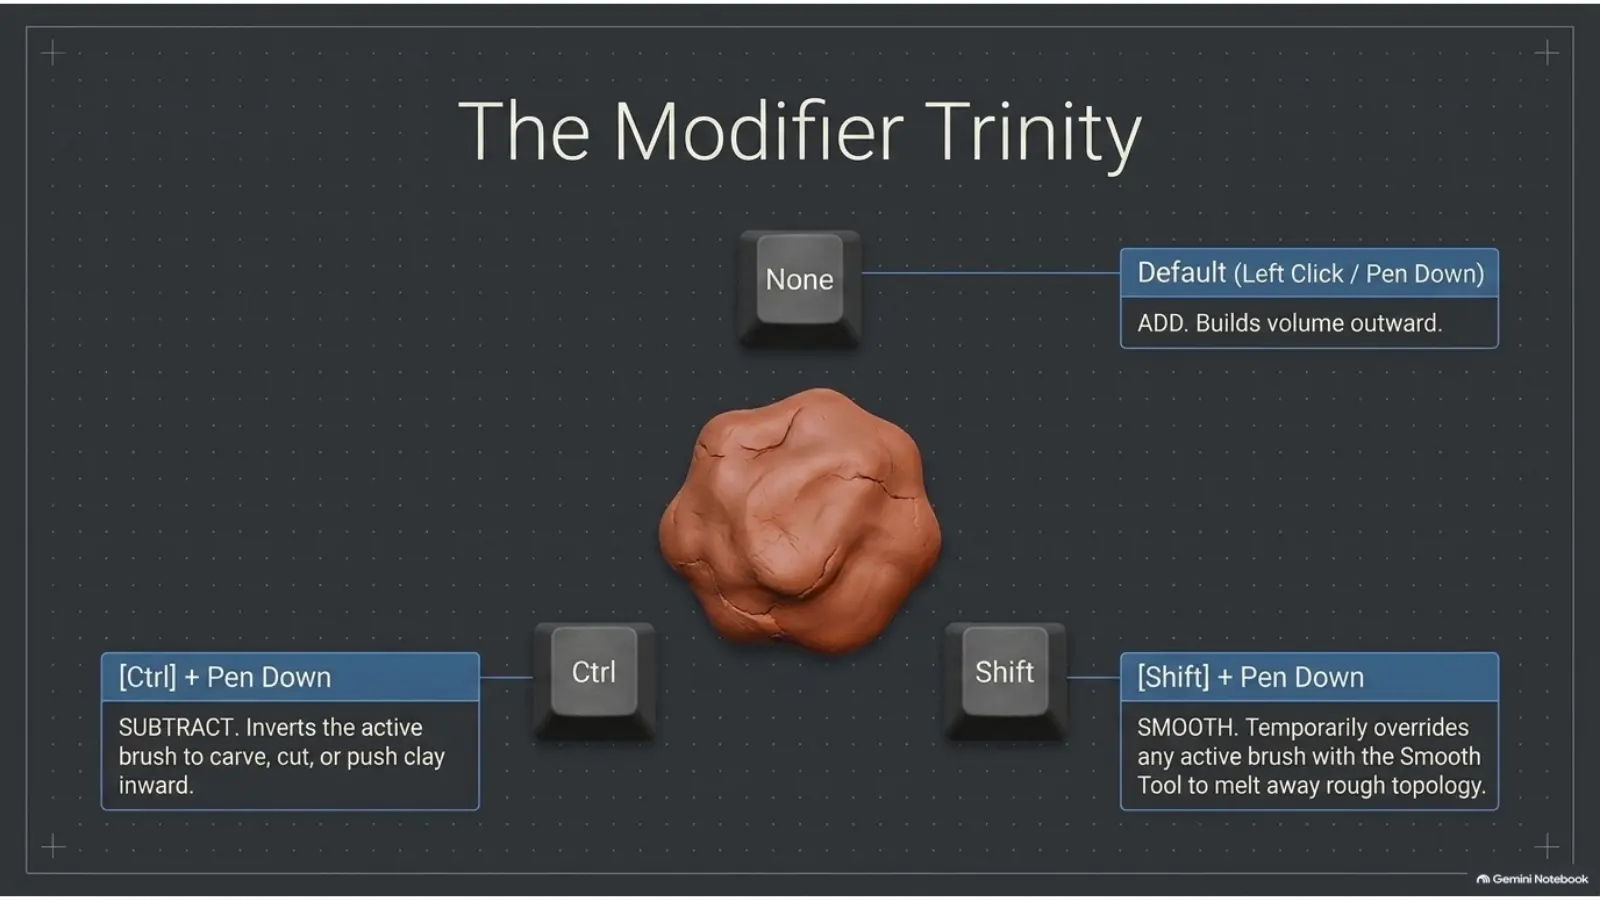
Hotkeys matter here too: F changes brush radius, Shift + F changes strength, and Shift temporarily smooths. Keep the Blender sculpting hotkeys cheat sheet open until these controls become muscle memory.
Why low-poly meshes stretch
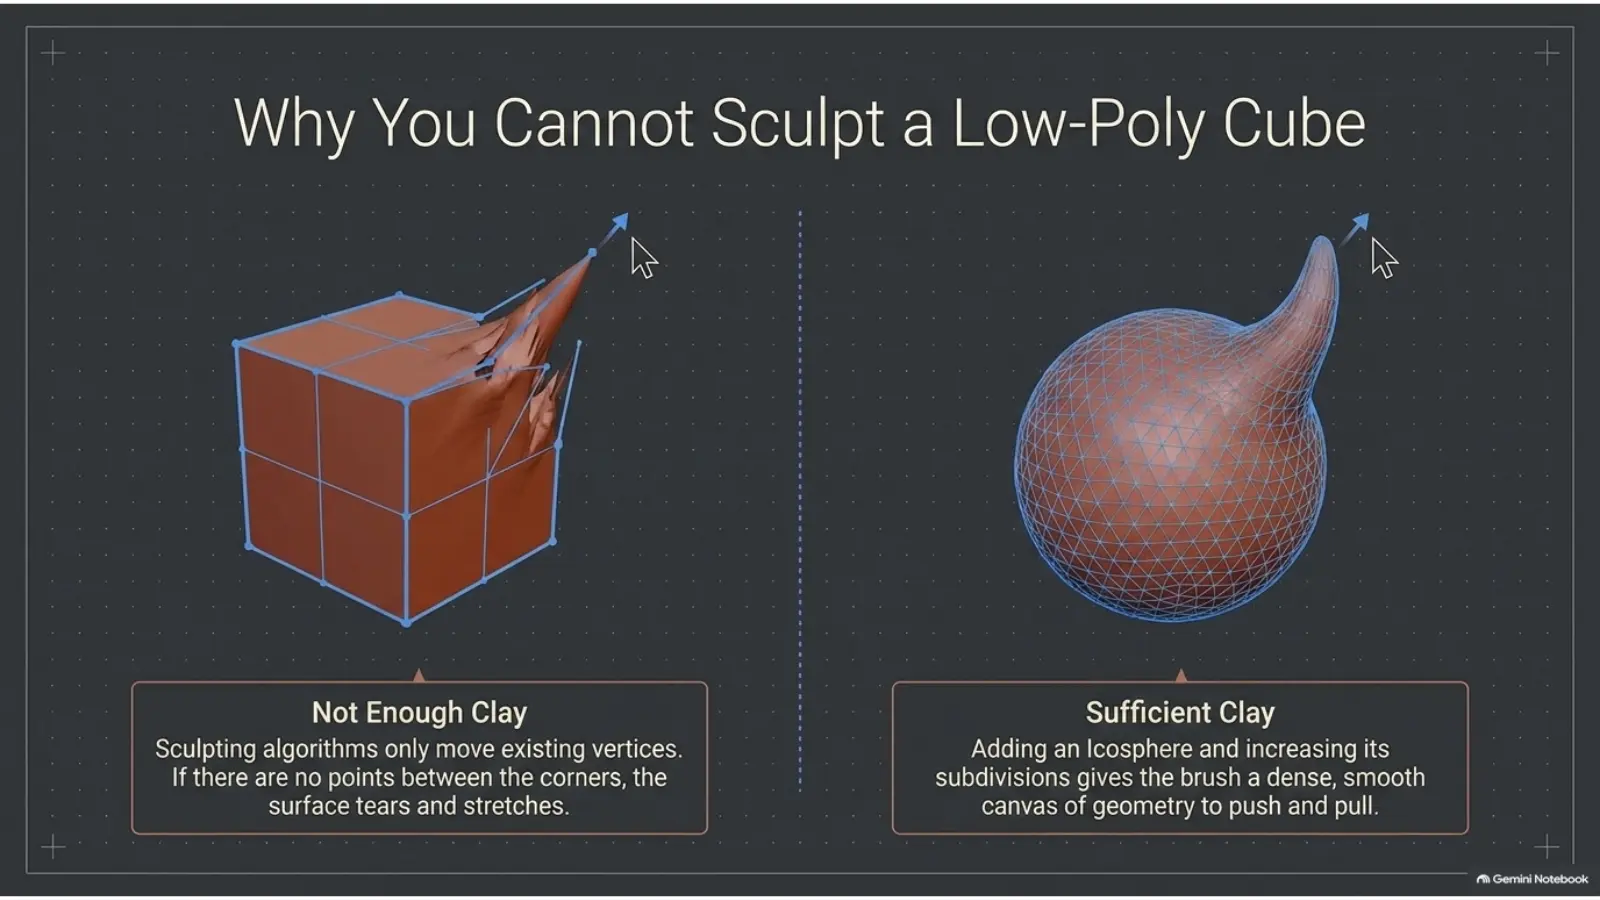
Sculpting algorithms can only move existing vertices. If a cube has almost no geometry between its corners, the surface tears and stretches instead of behaving like clay. A default cube has only eight vertices; a sculpt needs thousands. Add enough subdivisions, use an Icosphere for quick practice, or remesh before you expect brushes to make smooth forms. For beginner exercises, an Icosphere with subdivisions around 6-7 is a reliable starting point, as long as your machine stays responsive.
Moving around the workspace
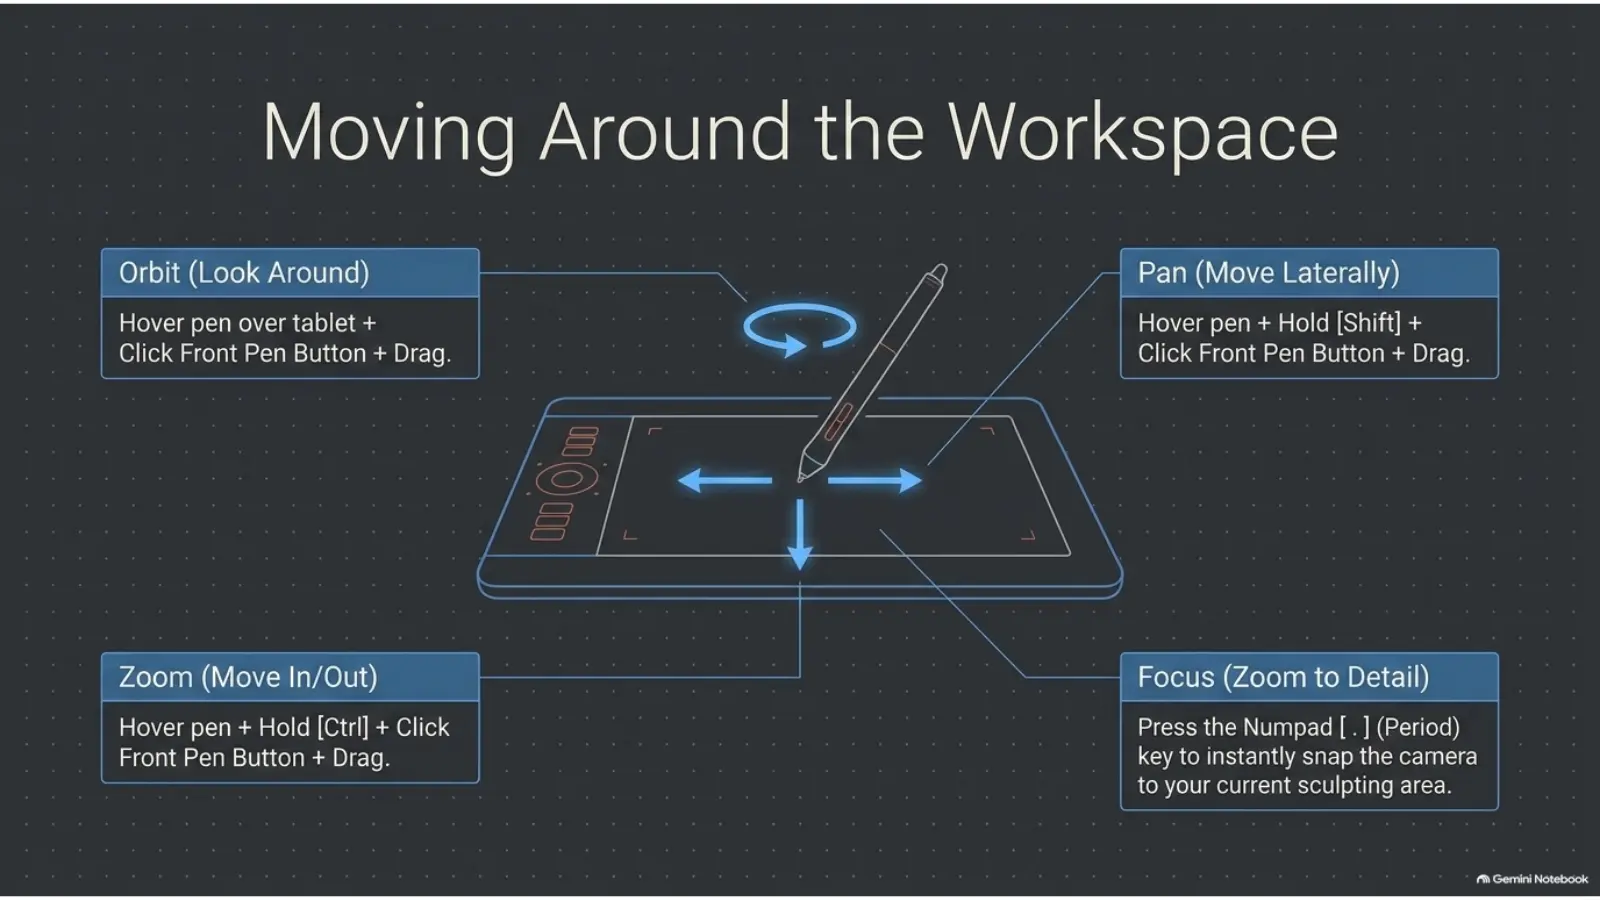
Before learning fancy brushes, learn to move around the model without thinking. Orbit to inspect the silhouette, pan to reframe the subject, zoom for detail, and use frame selected to focus on the active sculpting area. At first, navigation may feel slow and clumsy; that is normal. The goal is to make the hand move faster than the thought.
The sculpting toolkit: learn intent first
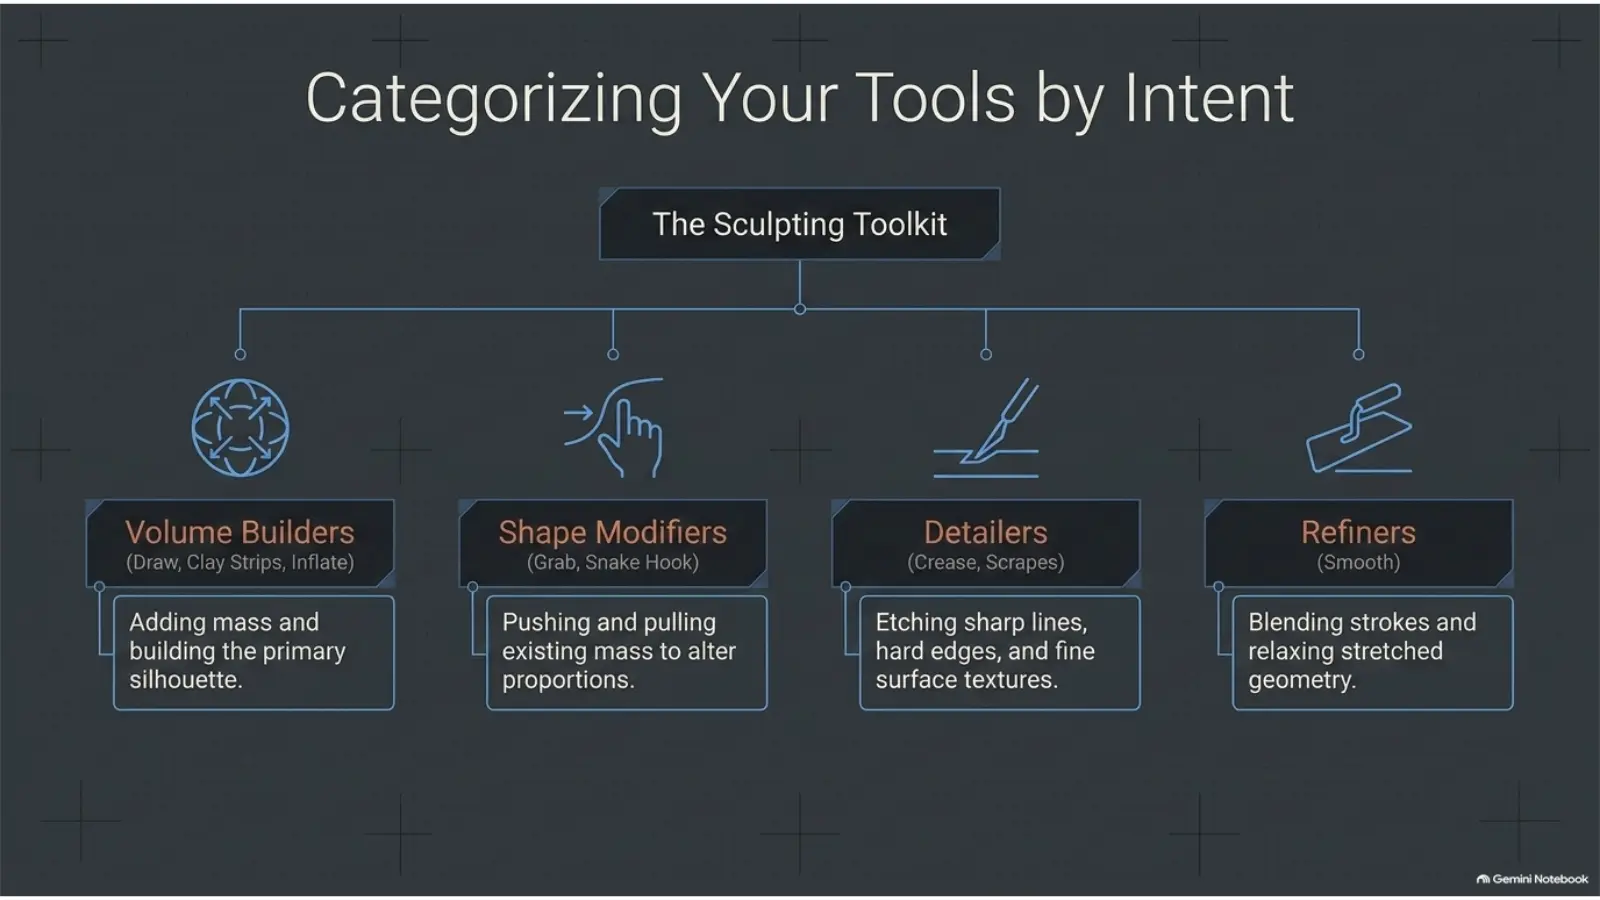
Do not memorize brushes as a random list. Group them by what they are trying to do. Volume builders add mass, shape modifiers move proportions, detailers carve surface information, and refiners smooth or relax the result. In practice, most beginner sculpts are carried by five tools: Draw or Clay Strips, Crease, Smooth, Grab and Inflate.
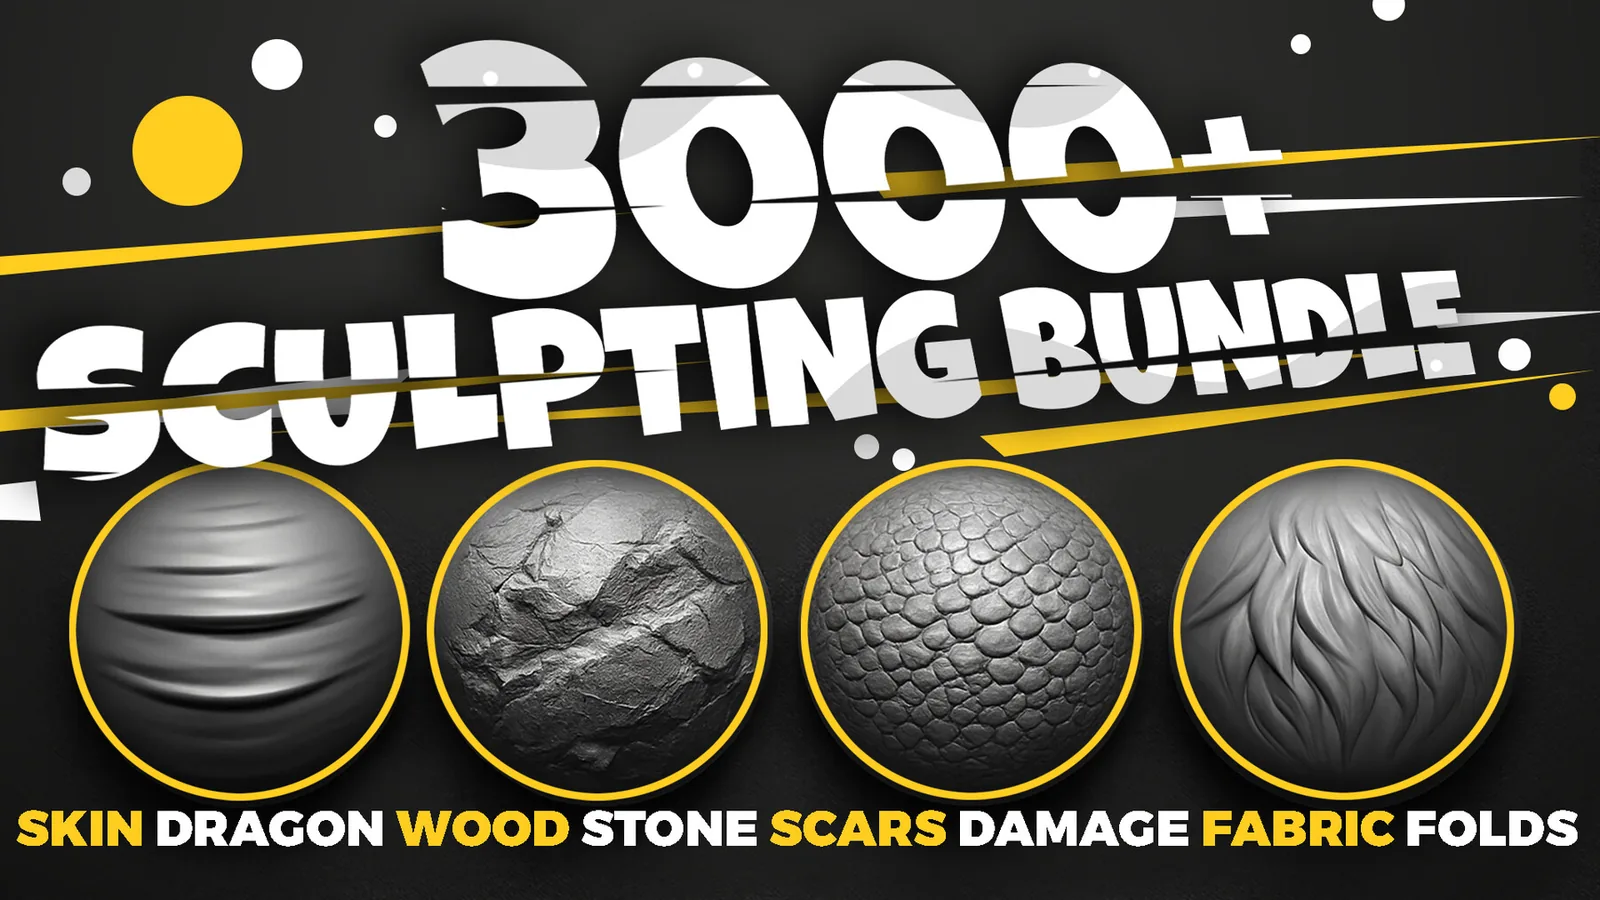
For a beginner-focused brush sequence, pair this section with Essential Blender Sculpting Brushes for Beginners. When you need a broader brush library for practice, use the 3000+ Sculpting Brushes Bundle.
Volume builders: Draw, Clay Strips, Blob and Inflate
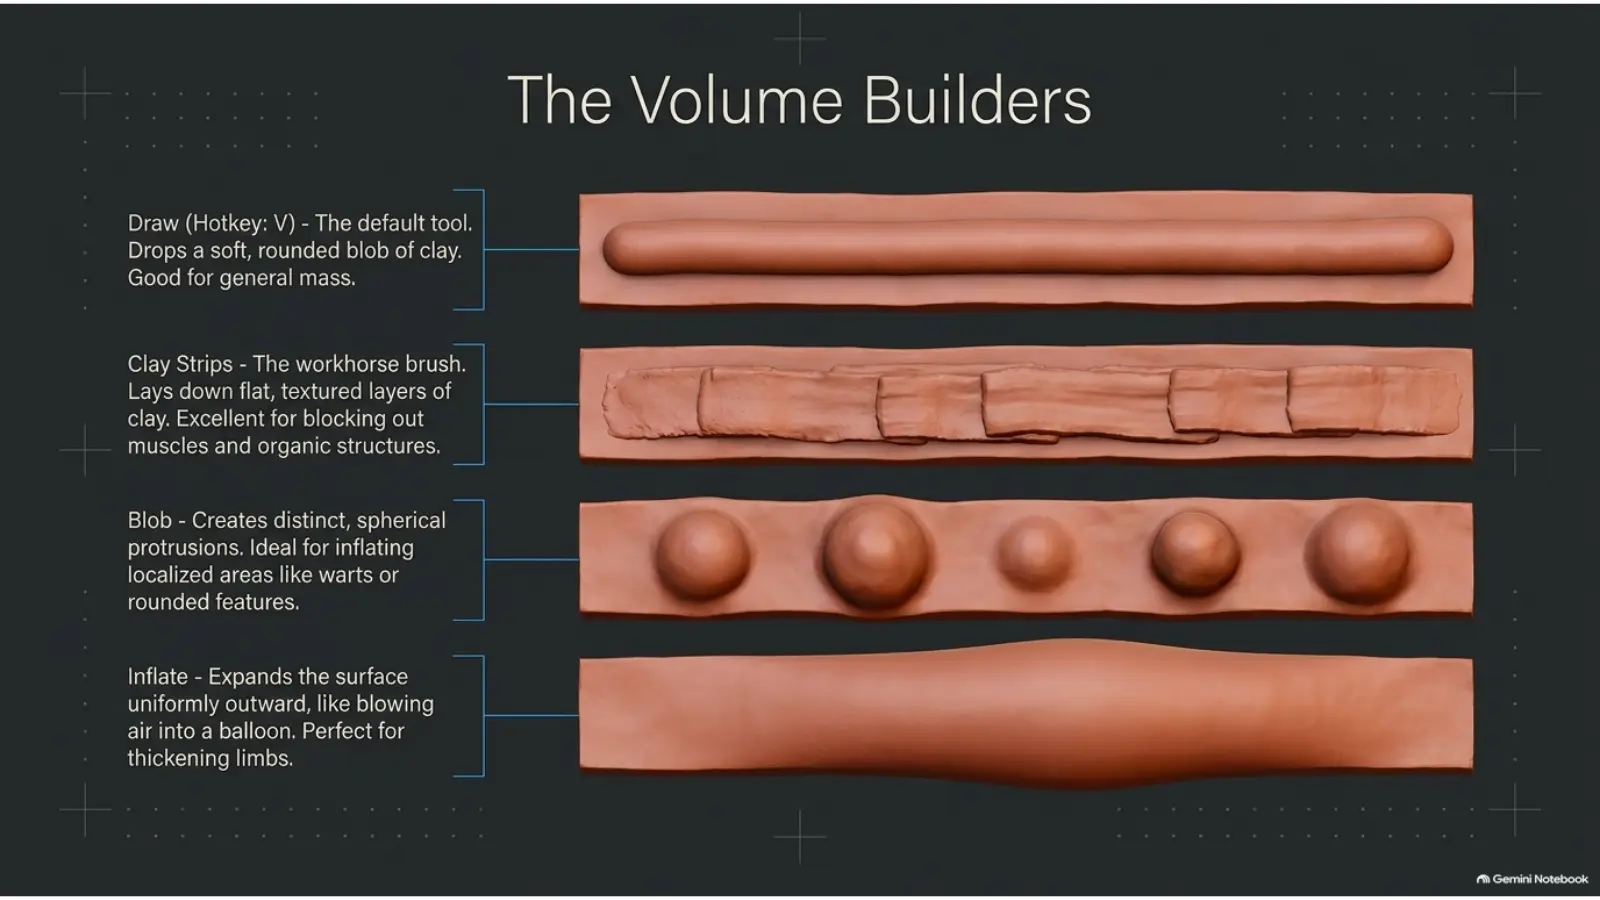
Volume builders are the first brush family to master. Draw adds soft mass, Clay Strips lays down planar clay, Blob creates localized bumps, and Inflate expands a surface outward. These are for primary and secondary forms, not tiny pores.
Shape modifiers and detailers
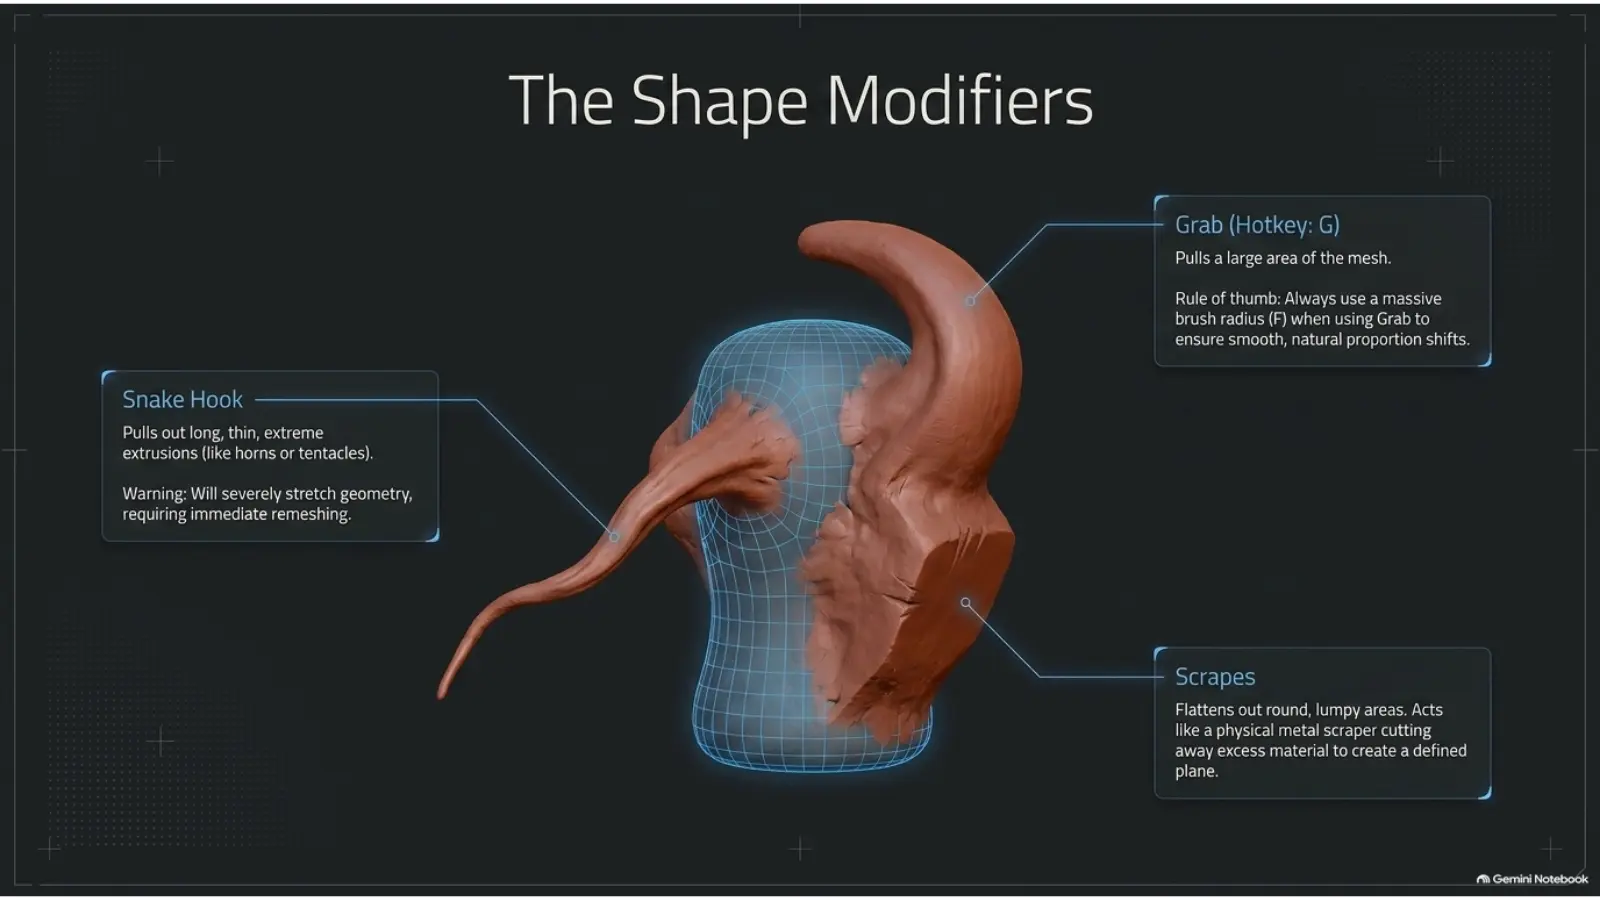
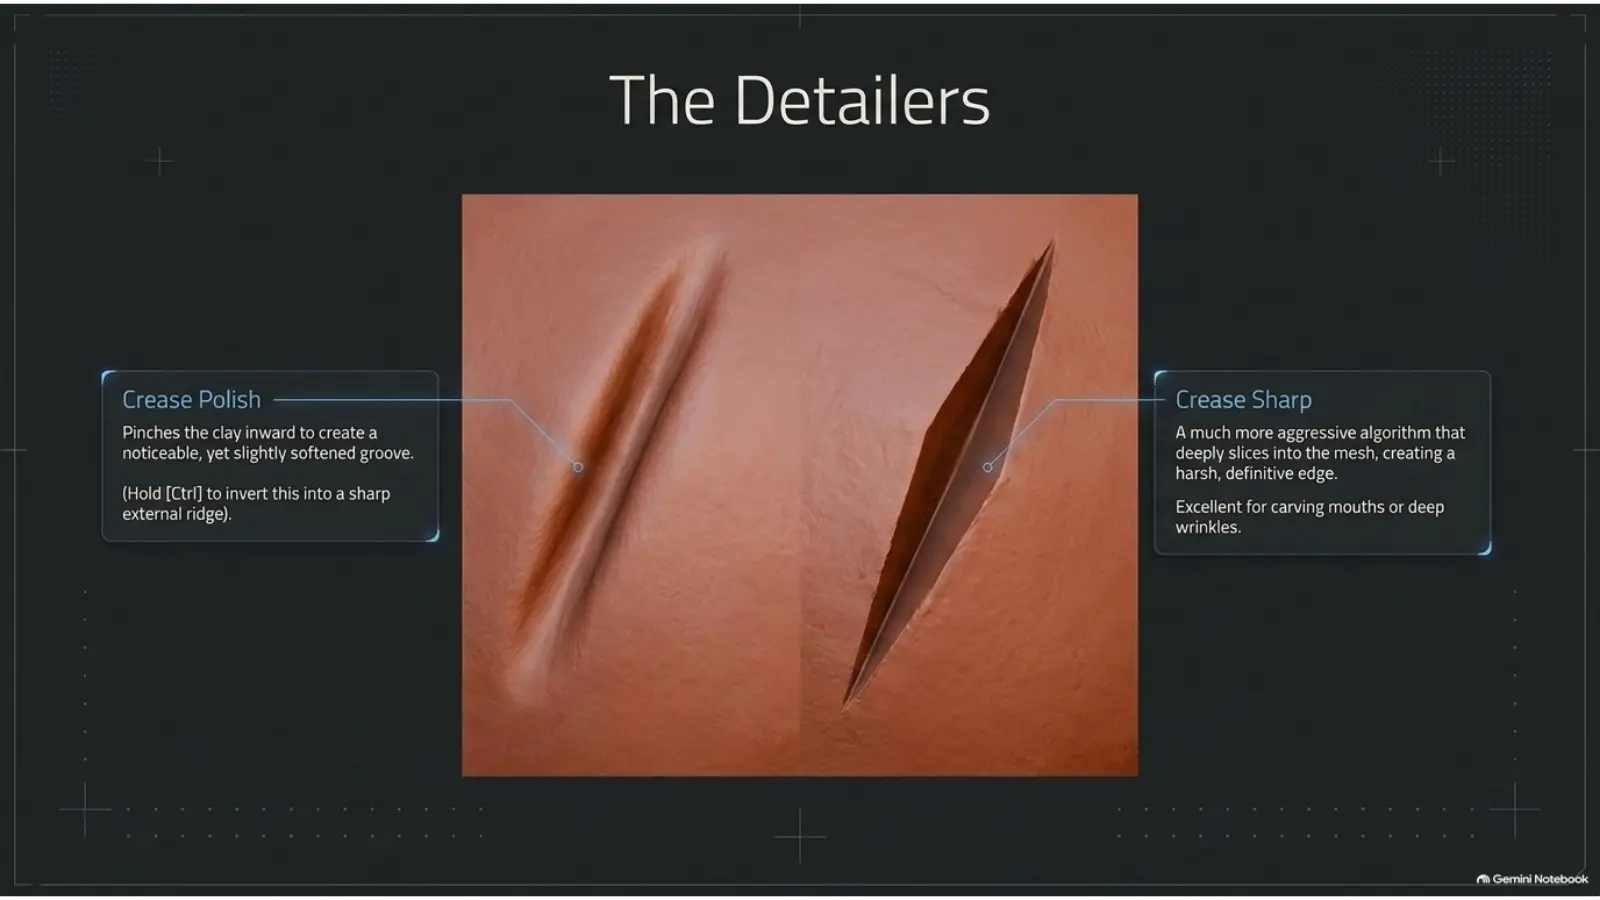
Shape modifiers change proportion. Grab moves a large area, Snake Hook pulls horns or tendrils, and Scrape cuts rounded lumps into cleaner planes. Detailers are smaller and sharper: Crease Polish gives a softened groove, while Crease Sharp slices harder edges for mouths, wrinkles and carved cuts.
Working symmetrically
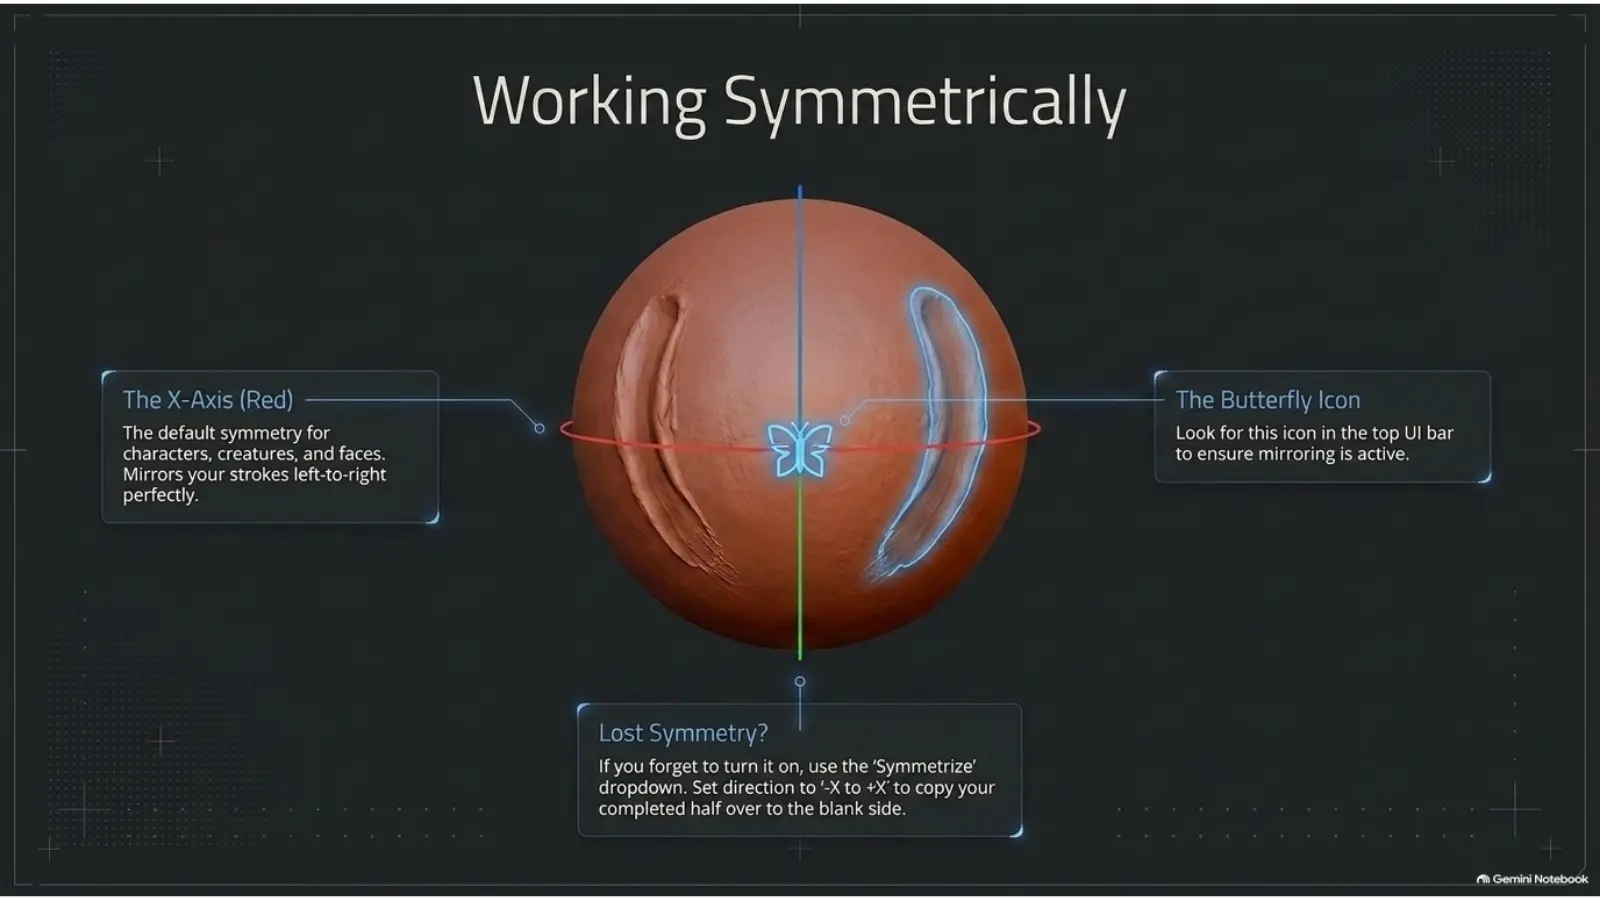
Characters, heads and creatures usually start with X-axis symmetry. Turn on the butterfly icon before you sculpt, then block both sides at once. A sculptor should spend energy on decisions, not repetition. If symmetry is lost, use Symmetrize to copy the finished side across the axis. Remember that Ctrl inverts most brushes: Draw subtracts instead of adding, which saves seconds that become hours over a full sculpt.
For a deeper symmetry workflow, read Symmetry and Mirror Sculpting in Blender.
Topology workflow: Remesh vs Dyntopo
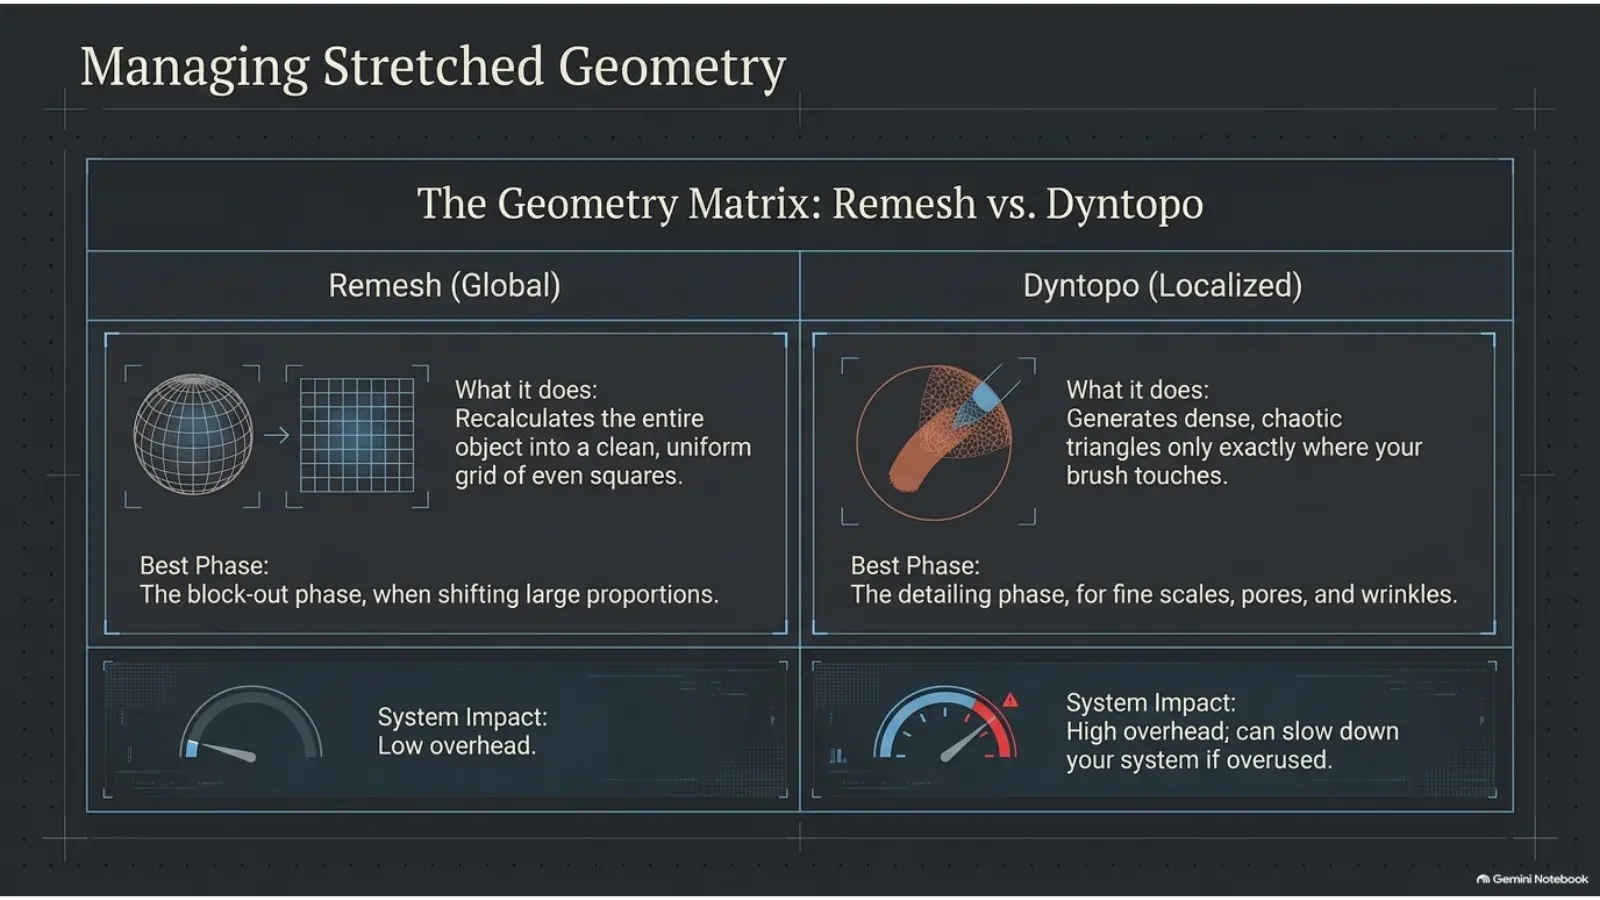
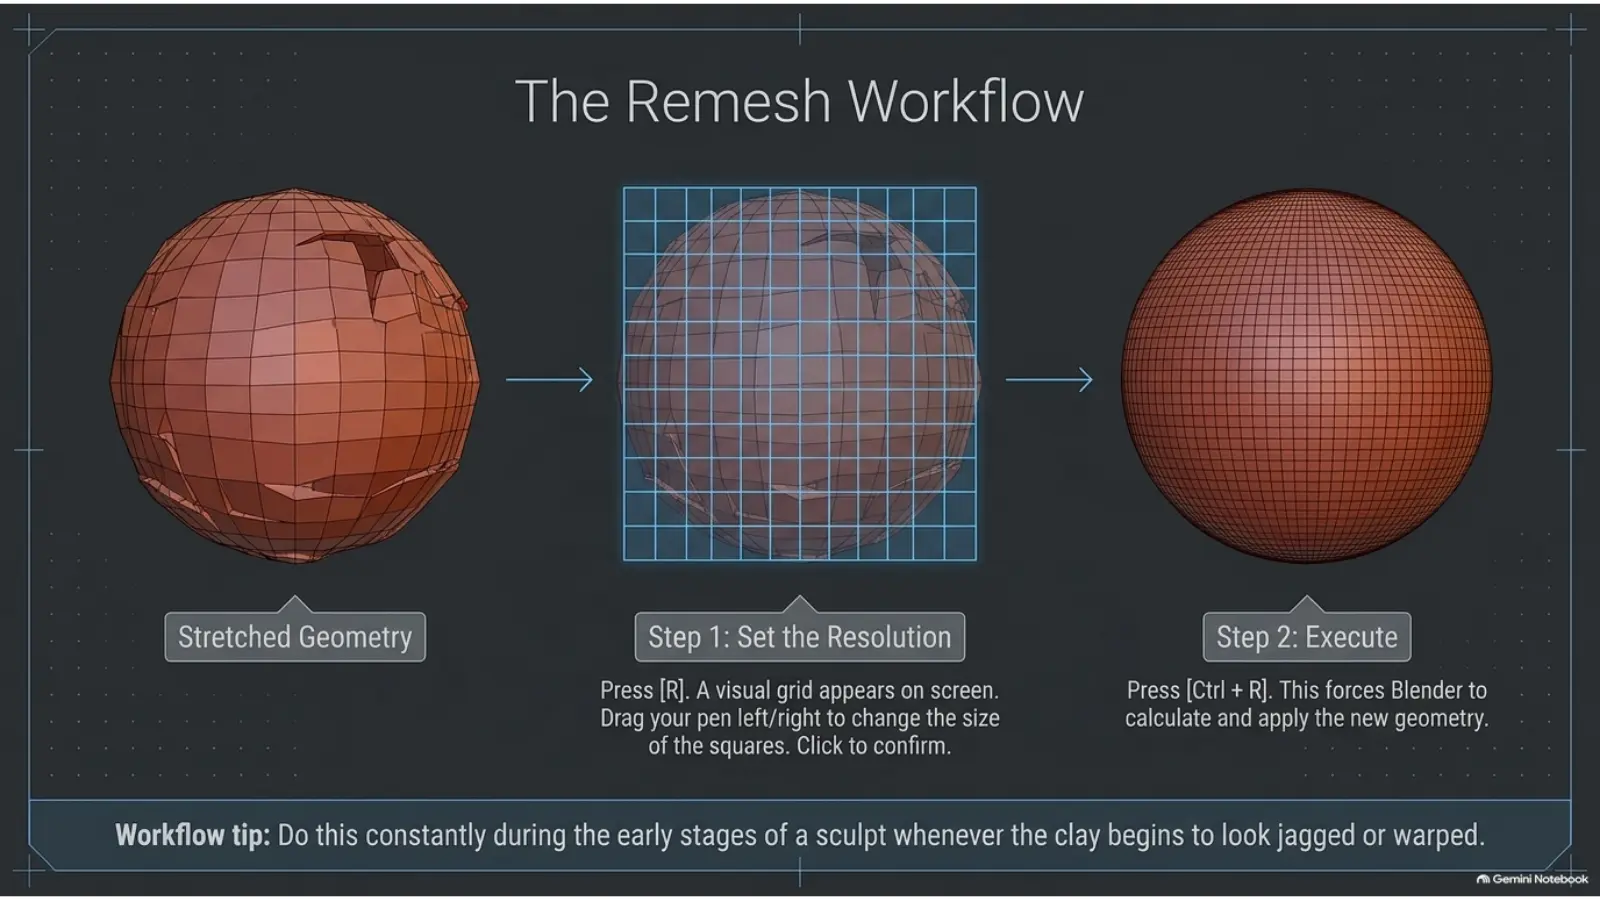
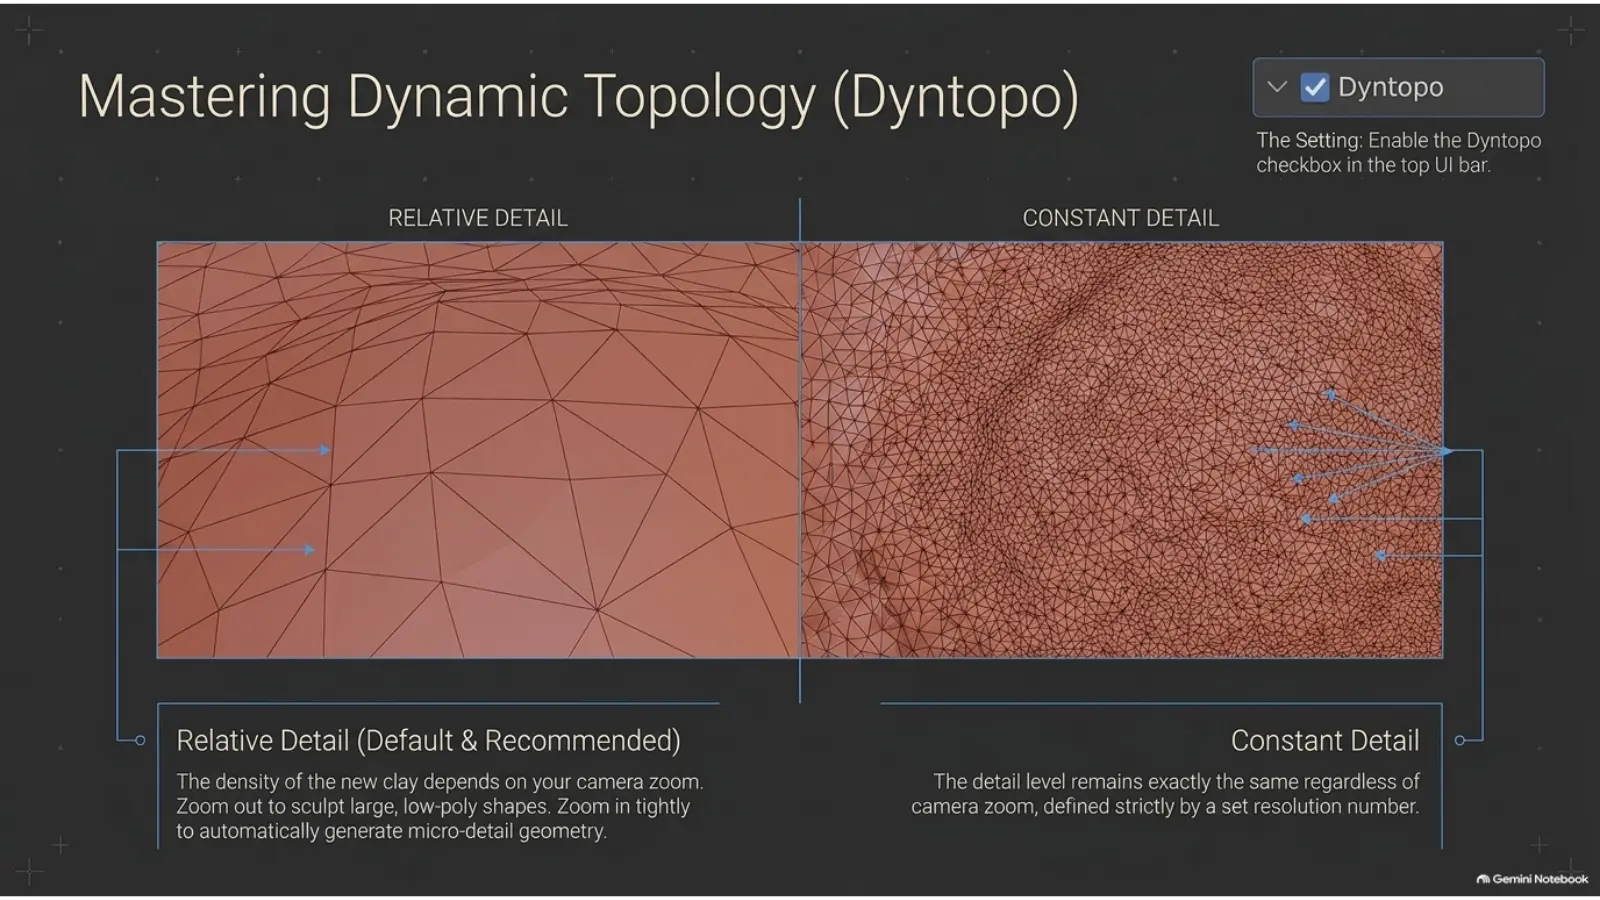
Beginners often confuse sculpting problems with brush problems. Many of them are actually topology problems. When Grab stretches the mesh into ugly ribbons, you have two main fixes. Use Remesh when the whole object needs a clean, even grid. Press R to preview the voxel size, then Ctrl + R to rebuild the geometry. Use Dyntopo when you need localized density exactly where the brush works.
The full decision tree is in Dyntopo vs Voxel Remesh in Blender. For a non-destructive sculpting setup, compare this with the Multires Modifier guide.
The sculpting lifecycle
A solid sculpt moves through phases. Block out the silhouette with Grab and Snake Hook. Build volume with Clay Strips, Draw, Blob and Inflate. Add micro-detail with Crease, Scrape, alphas and custom brushes. Finish with paint, materials and presentation lighting.
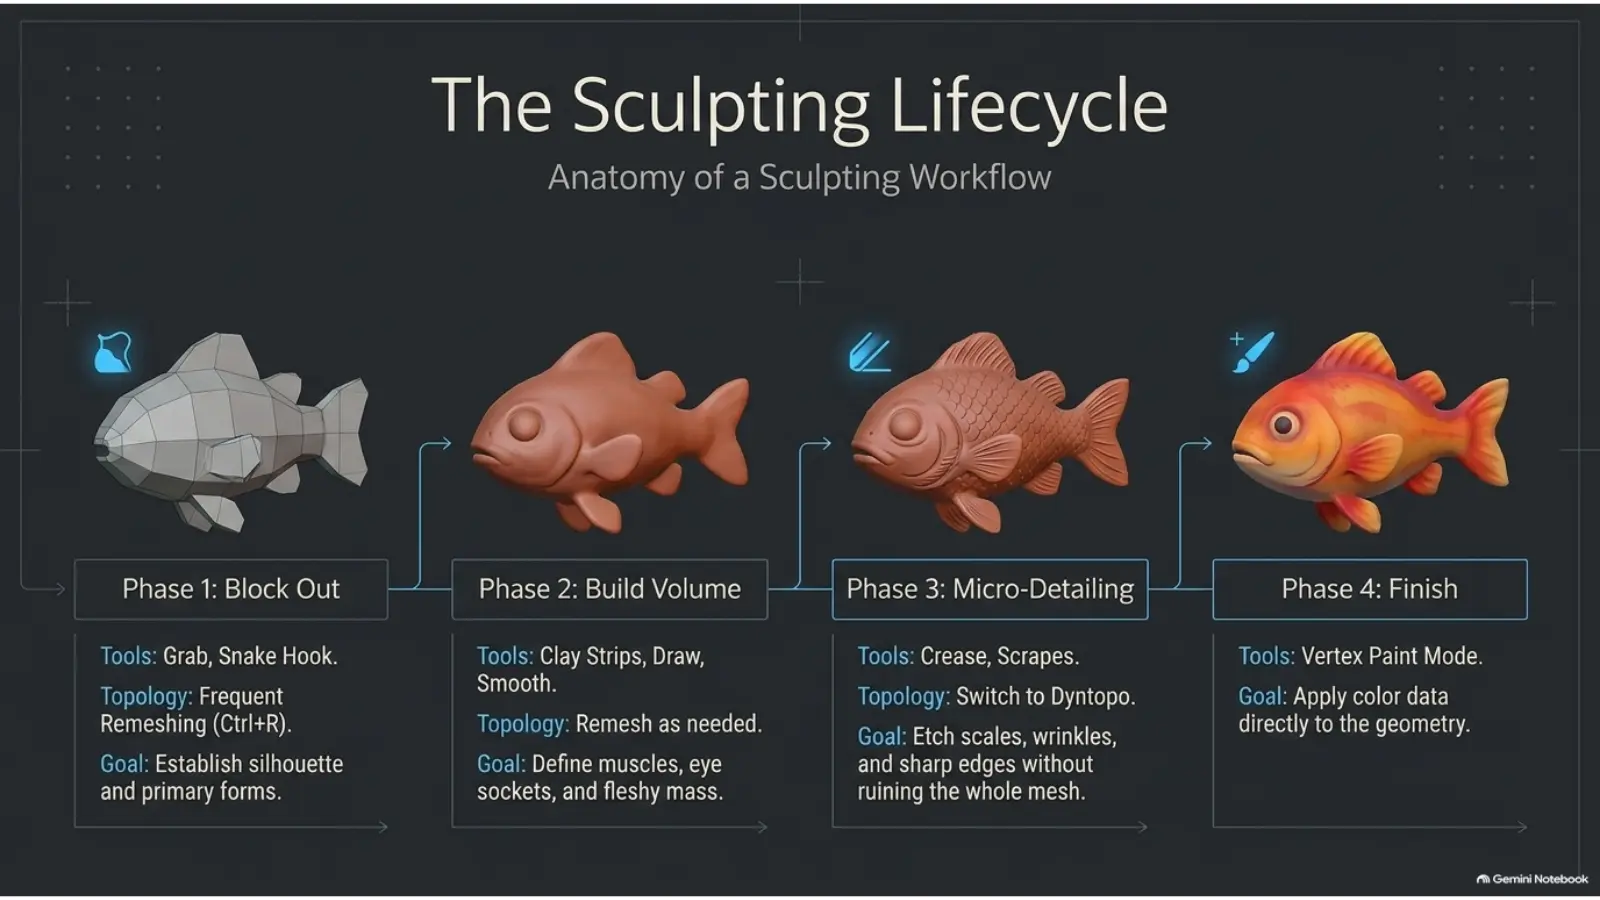
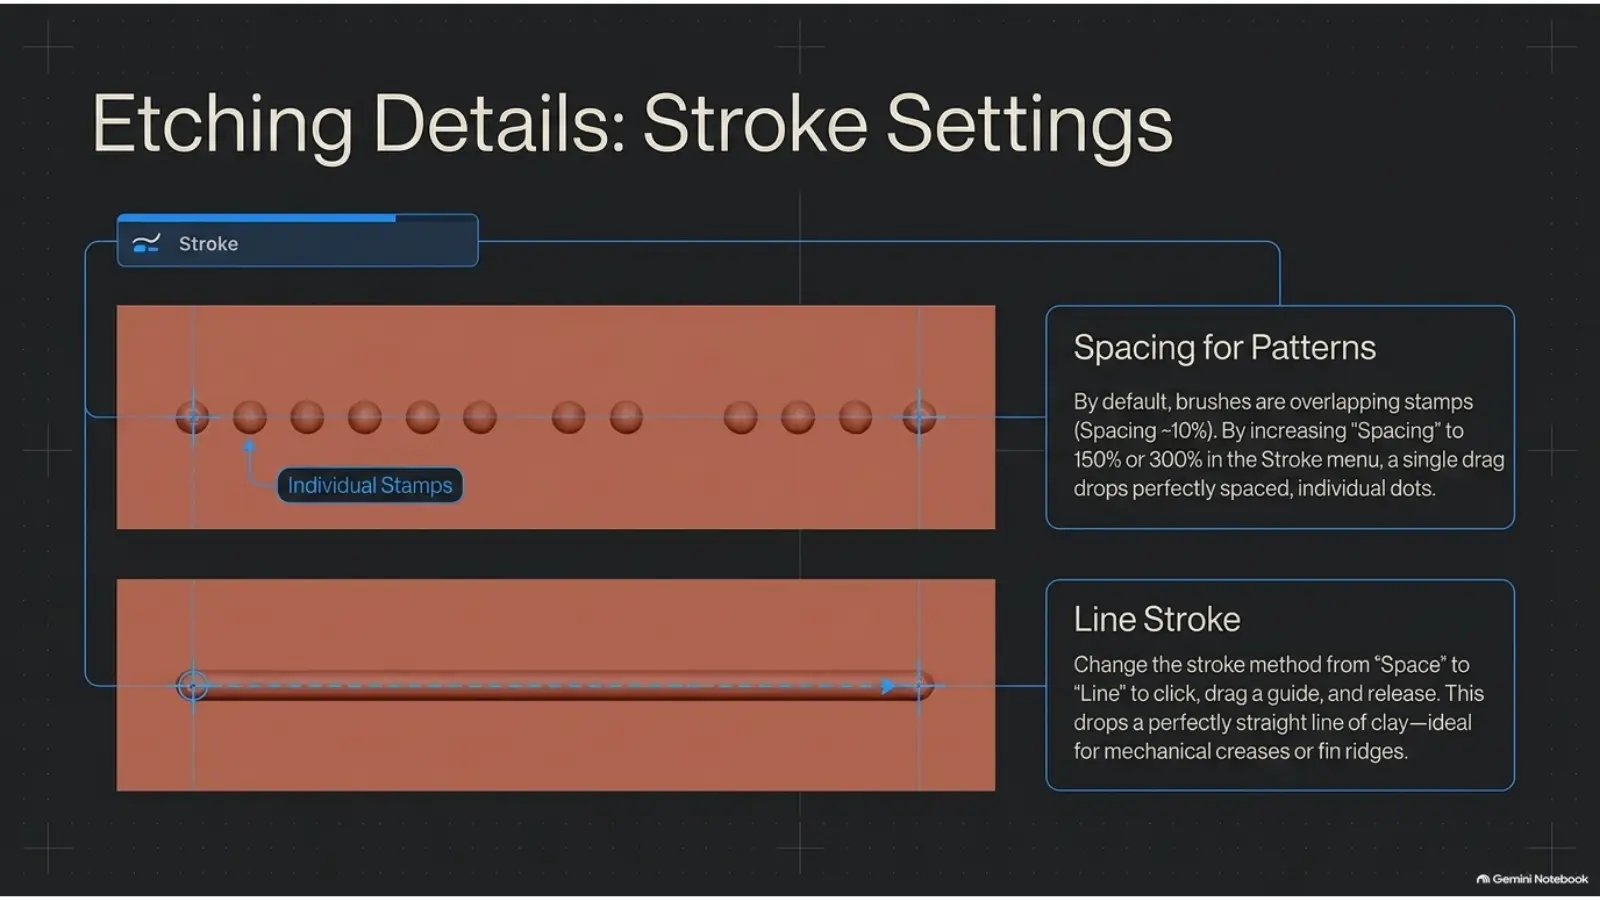
Custom brushes make the micro-detail phase easier. Skin pores, fabric folds, wood grain, rock cracks, wounds and ornament patterns can be stamped in a controlled way instead of sculpted from nothing. Start with Best Blender Sculpting Brushes, then branch into skin brushes, fabric brushes, rock and stone brushes or wood brushes.
Brush settings that prevent beginner damage
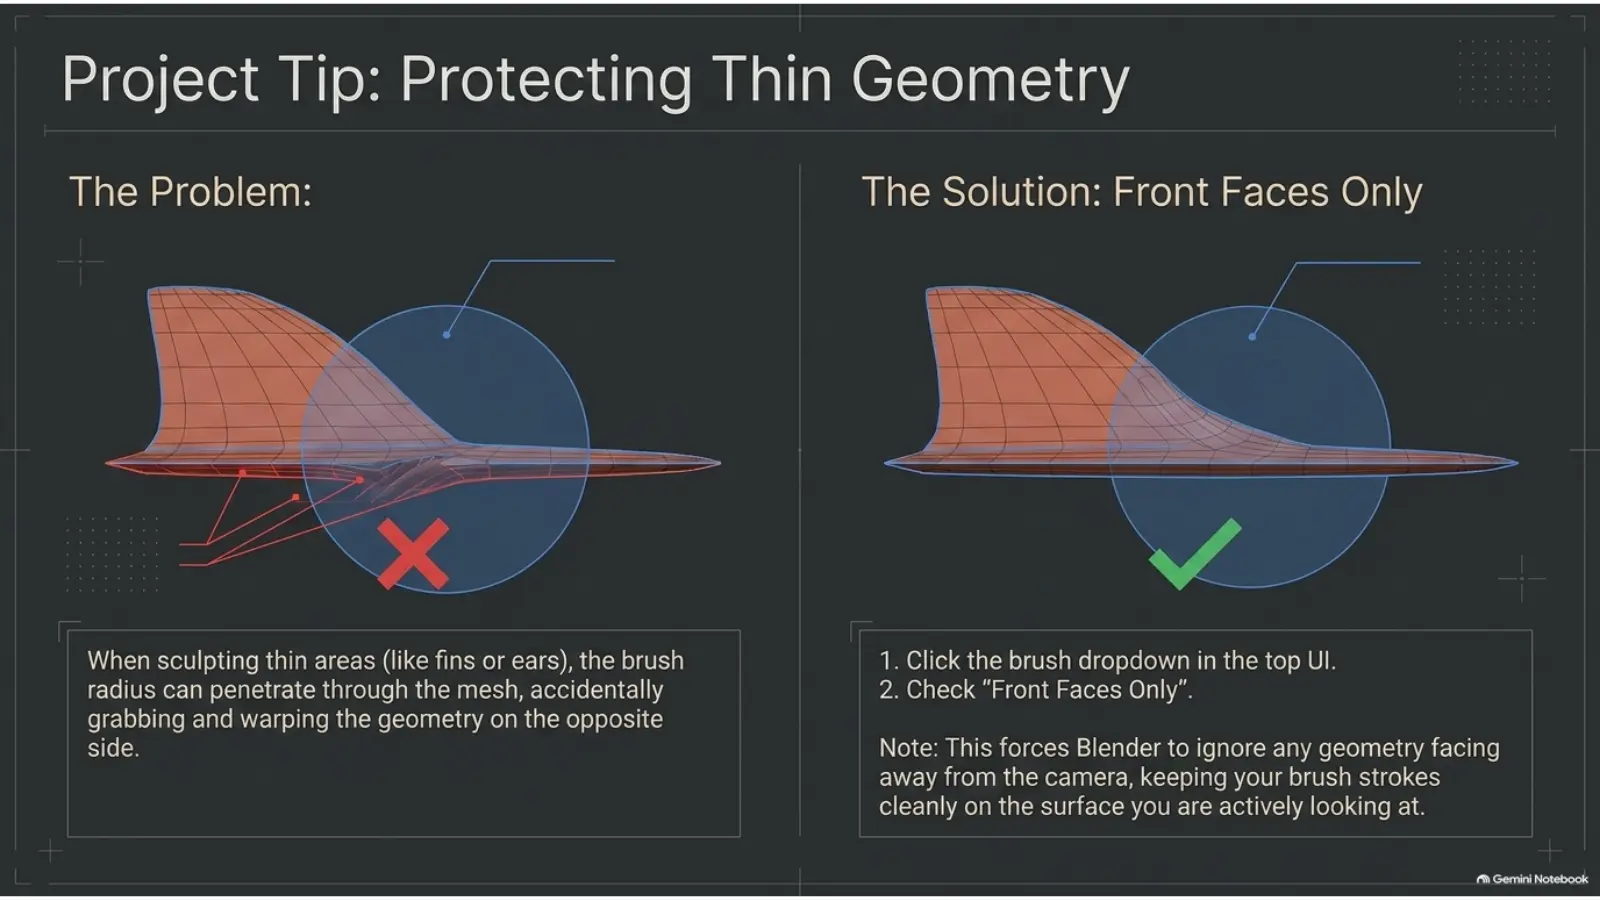
Thin forms such as ears, fins, cloth edges and horns are easy to damage because a large brush radius can affect geometry behind the visible surface. Turn on Front Faces Only when you need strokes to stay on the side facing the camera.
If brushes do not show up, behave incorrectly, or are missing from the Asset Browser, use the Blender brush installation guide and Blender sculpting not working fixes.
Three week practice plan
Keep sessions short and repeatable. Thirty to sixty minutes is enough if every session has one clear skill target.
Save a screenshot after each session. Compare silhouettes, proportions, planes and surface cleanliness every two weeks. If those are improving, your sculpting practice is working even before the models look portfolio-ready.
Vertex paint and final surfacing
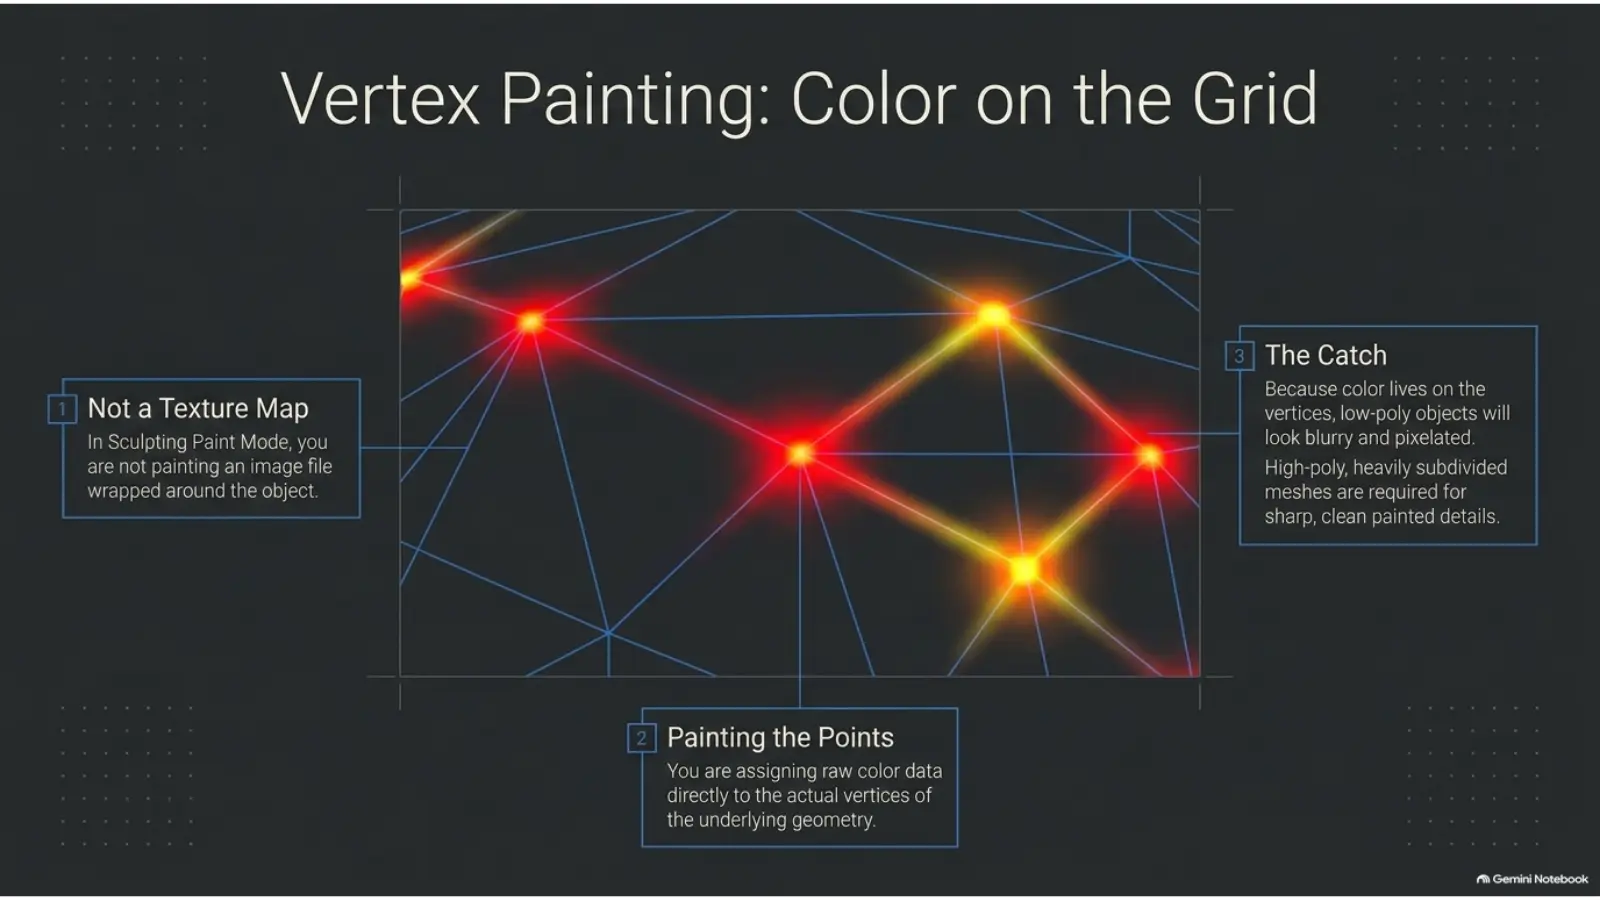
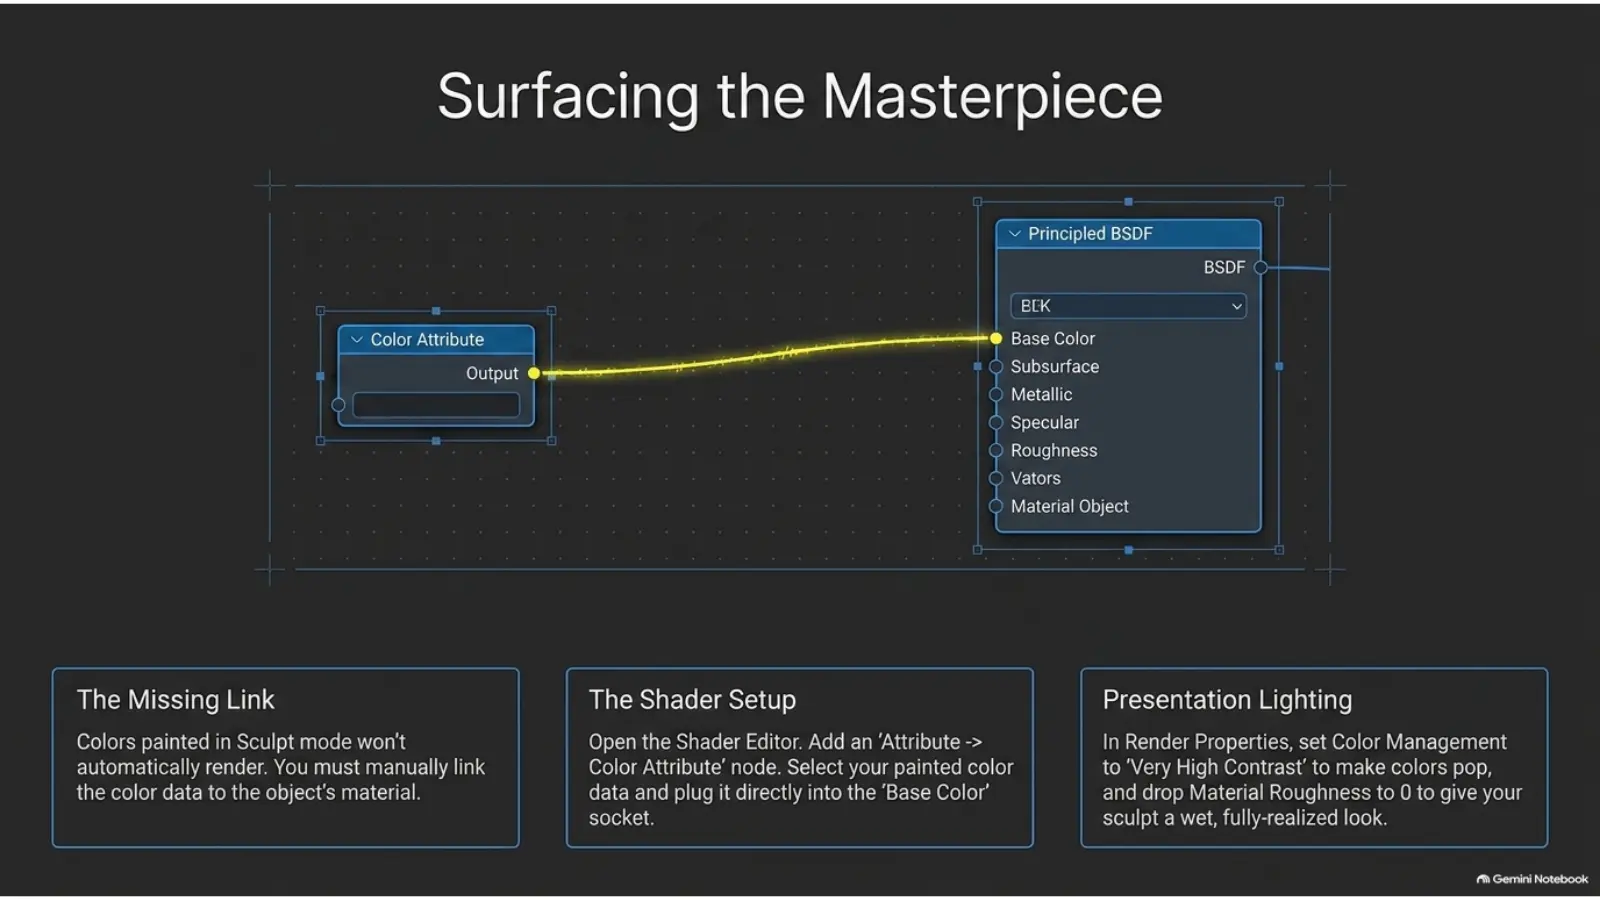
Sculpt Mode color is not the same as a finished material. Vertex Painting lets you paint the mesh vertices directly, which is useful for fast creature color, concept sculpts and practice renders before a full UV workflow. Vertex paint stores color on mesh points, so sharp painted detail needs enough geometry. To render the color, open the Shader Editor, add a Color Attribute node, connect it into the material's Base Color input, then adjust lighting and color management for presentation.
Internal learning links
Use this article as the roadmap, then jump into the focused guides when a specific part of the workflow slows you down.
Featured VK GameDev products
These bundles help students learn faster by turning surface detail into a controlled brush pass instead of a slow manual grind.
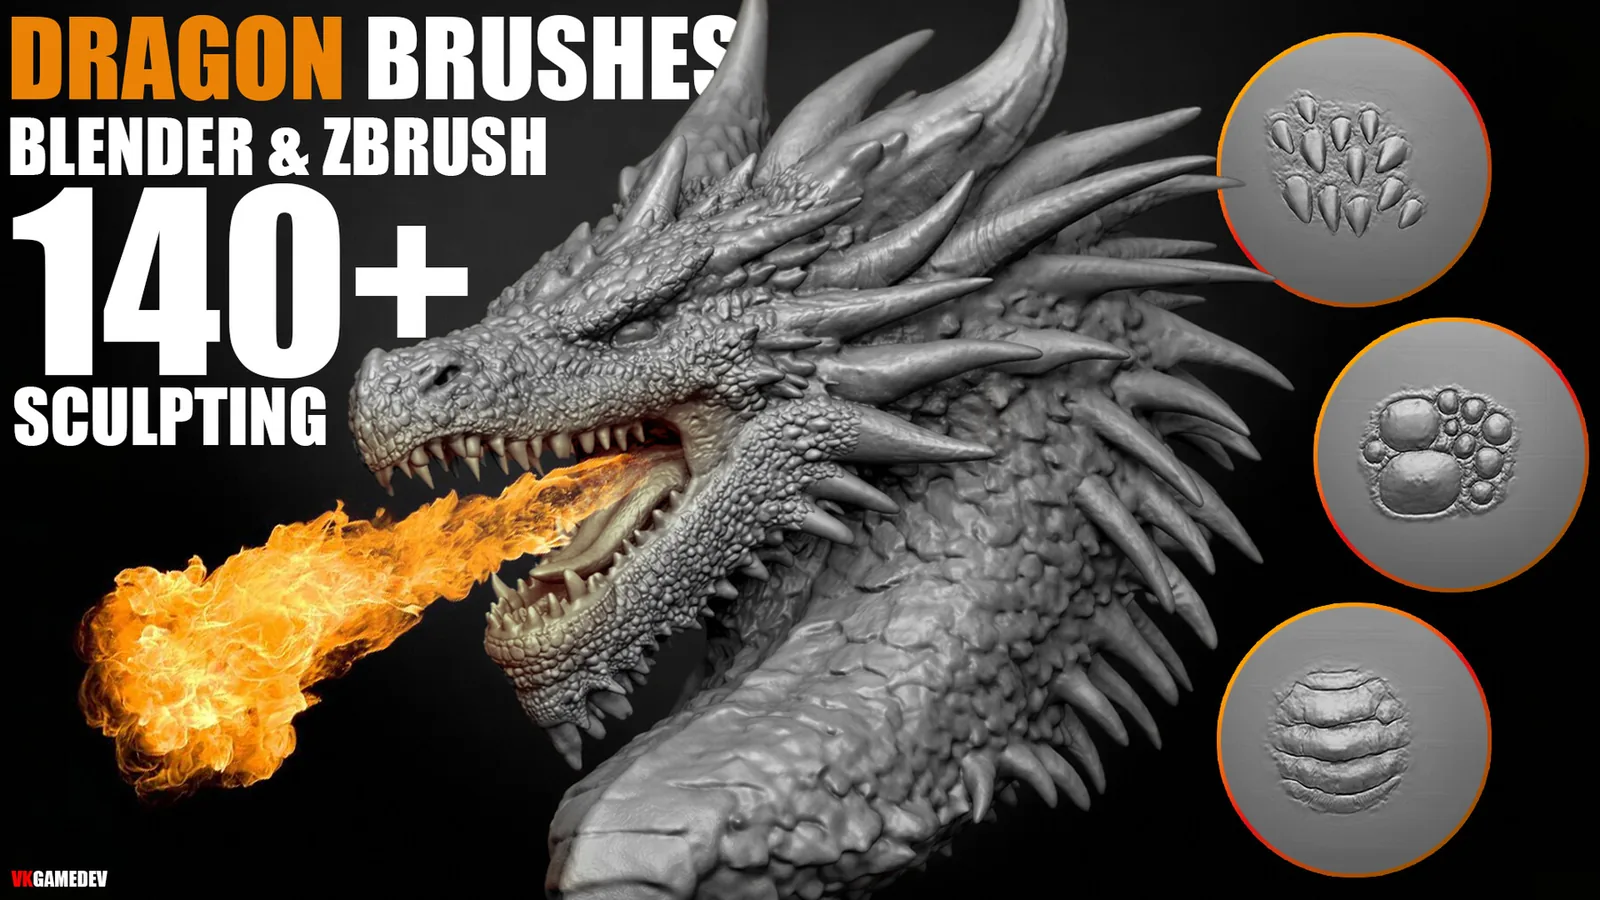
Dragon Skin Brushes
Creature skin brushes that help you study scales, pores, folds and organic surface breakup.
FAQ
Can I learn Blender sculpting from scratch without ZBrush?
Yes. Blender is enough for learning fundamentals, practicing form, building game-ready assets and finishing many personal or freelance sculpts.
Do I need a drawing tablet for Blender sculpting?
A tablet is strongly recommended because pressure sensitivity controls stroke size and strength more naturally than a mouse. You can start with a mouse, but a tablet gives smoother lines, better posture and more organic control.
Should I learn Dyntopo or Remesh first?
Learn Remesh first for clean blockouts, then add Dyntopo when you understand where localized detail is actually needed.
When should I use custom Blender brushes?
Use custom brushes after the main form works. They are best for pores, folds, cracks, fabric seams, wood grain, damage and other surface detail.
What is the biggest beginner mistake?
Adding detail before the primary forms are strong. Blockout, volume and silhouette should come before pores, wrinkles or texture stamps.
Useful links
Blender sculpting beginner guide · Hotkeys for Blender sculpting · Best Blender sculpting brushes list · Install Blender brushes
Dyntopo vs Voxel Remesh · Multires modifier guide · Symmetry and mirror sculpting · Explore the 3000+ sculpting brushes bundle