Article
Blender Dyntopo vs Voxel Remesh: Fix Merged Fingers, Holes and Lost Detail
If Voxel Remesh connects fingers or closes a narrow gap, increase the physical separation or use a smaller Voxel Size before remeshing. Face Sets help you organize, isolate and reproject labeled regions, but they do not create a barrier that prevents nearby surfaces from merging. Use Dyntopo when you need local topology changes without rebuilding the whole volume.
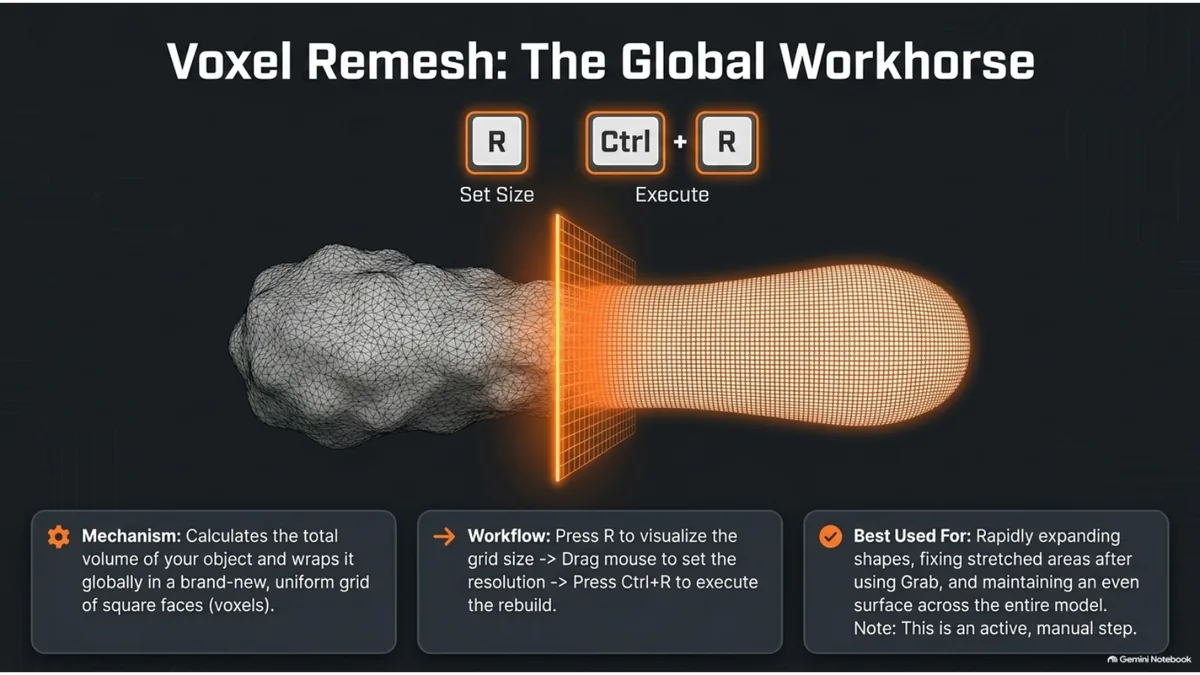
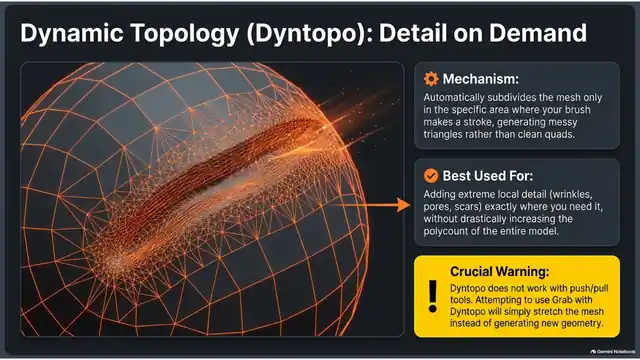
Dyntopo adds polygons only where you sculpt, while Voxel Remesh redistributes polygons evenly across the whole mesh. Both are useful, but they solve different problems. Understanding their strengths lets you keep your sculpt clean, fast, and flexible as you move from blockout to detail.
Contents
Dyntopo vs Voxel Remesh at a glance
Both tools change your mesh density, but for opposite reasons: Dyntopo adds detail where you sculpt, Voxel Remesh rebuilds the whole mesh evenly. Use this table to pick the right one for the stage you're at.
| Aspect | Dyntopo | Voxel Remesh |
|---|---|---|
| How it adds density | Only where you actively sculpt | Rebuilds the entire mesh evenly |
| Best stage | Secondary forms and fine detail | Blockout and early silhouette |
| Topology result | Uneven, can get messy over time | Clean and uniform |
| Detail preservation | Keeps detail as you add it | Can soften or erase small detail on each pass |
| Performance impact | Slows down as local density climbs unevenly | One-time cost per remesh, then stable |
| Good for low-spec PCs | Only with a large Detail Size | Yes, with a larger Voxel Size |
Dynamic Topology (Dyntopo)
Dynamic Topology is a sculpting mode that adds polygons only where you sculpt. It is ideal for localized detail because the mesh becomes dense only where you need it. This makes Dyntopo excellent for wrinkles, pores, and fine surface details. It is also flexible because you can continue to push and pull without committing to a fixed resolution.
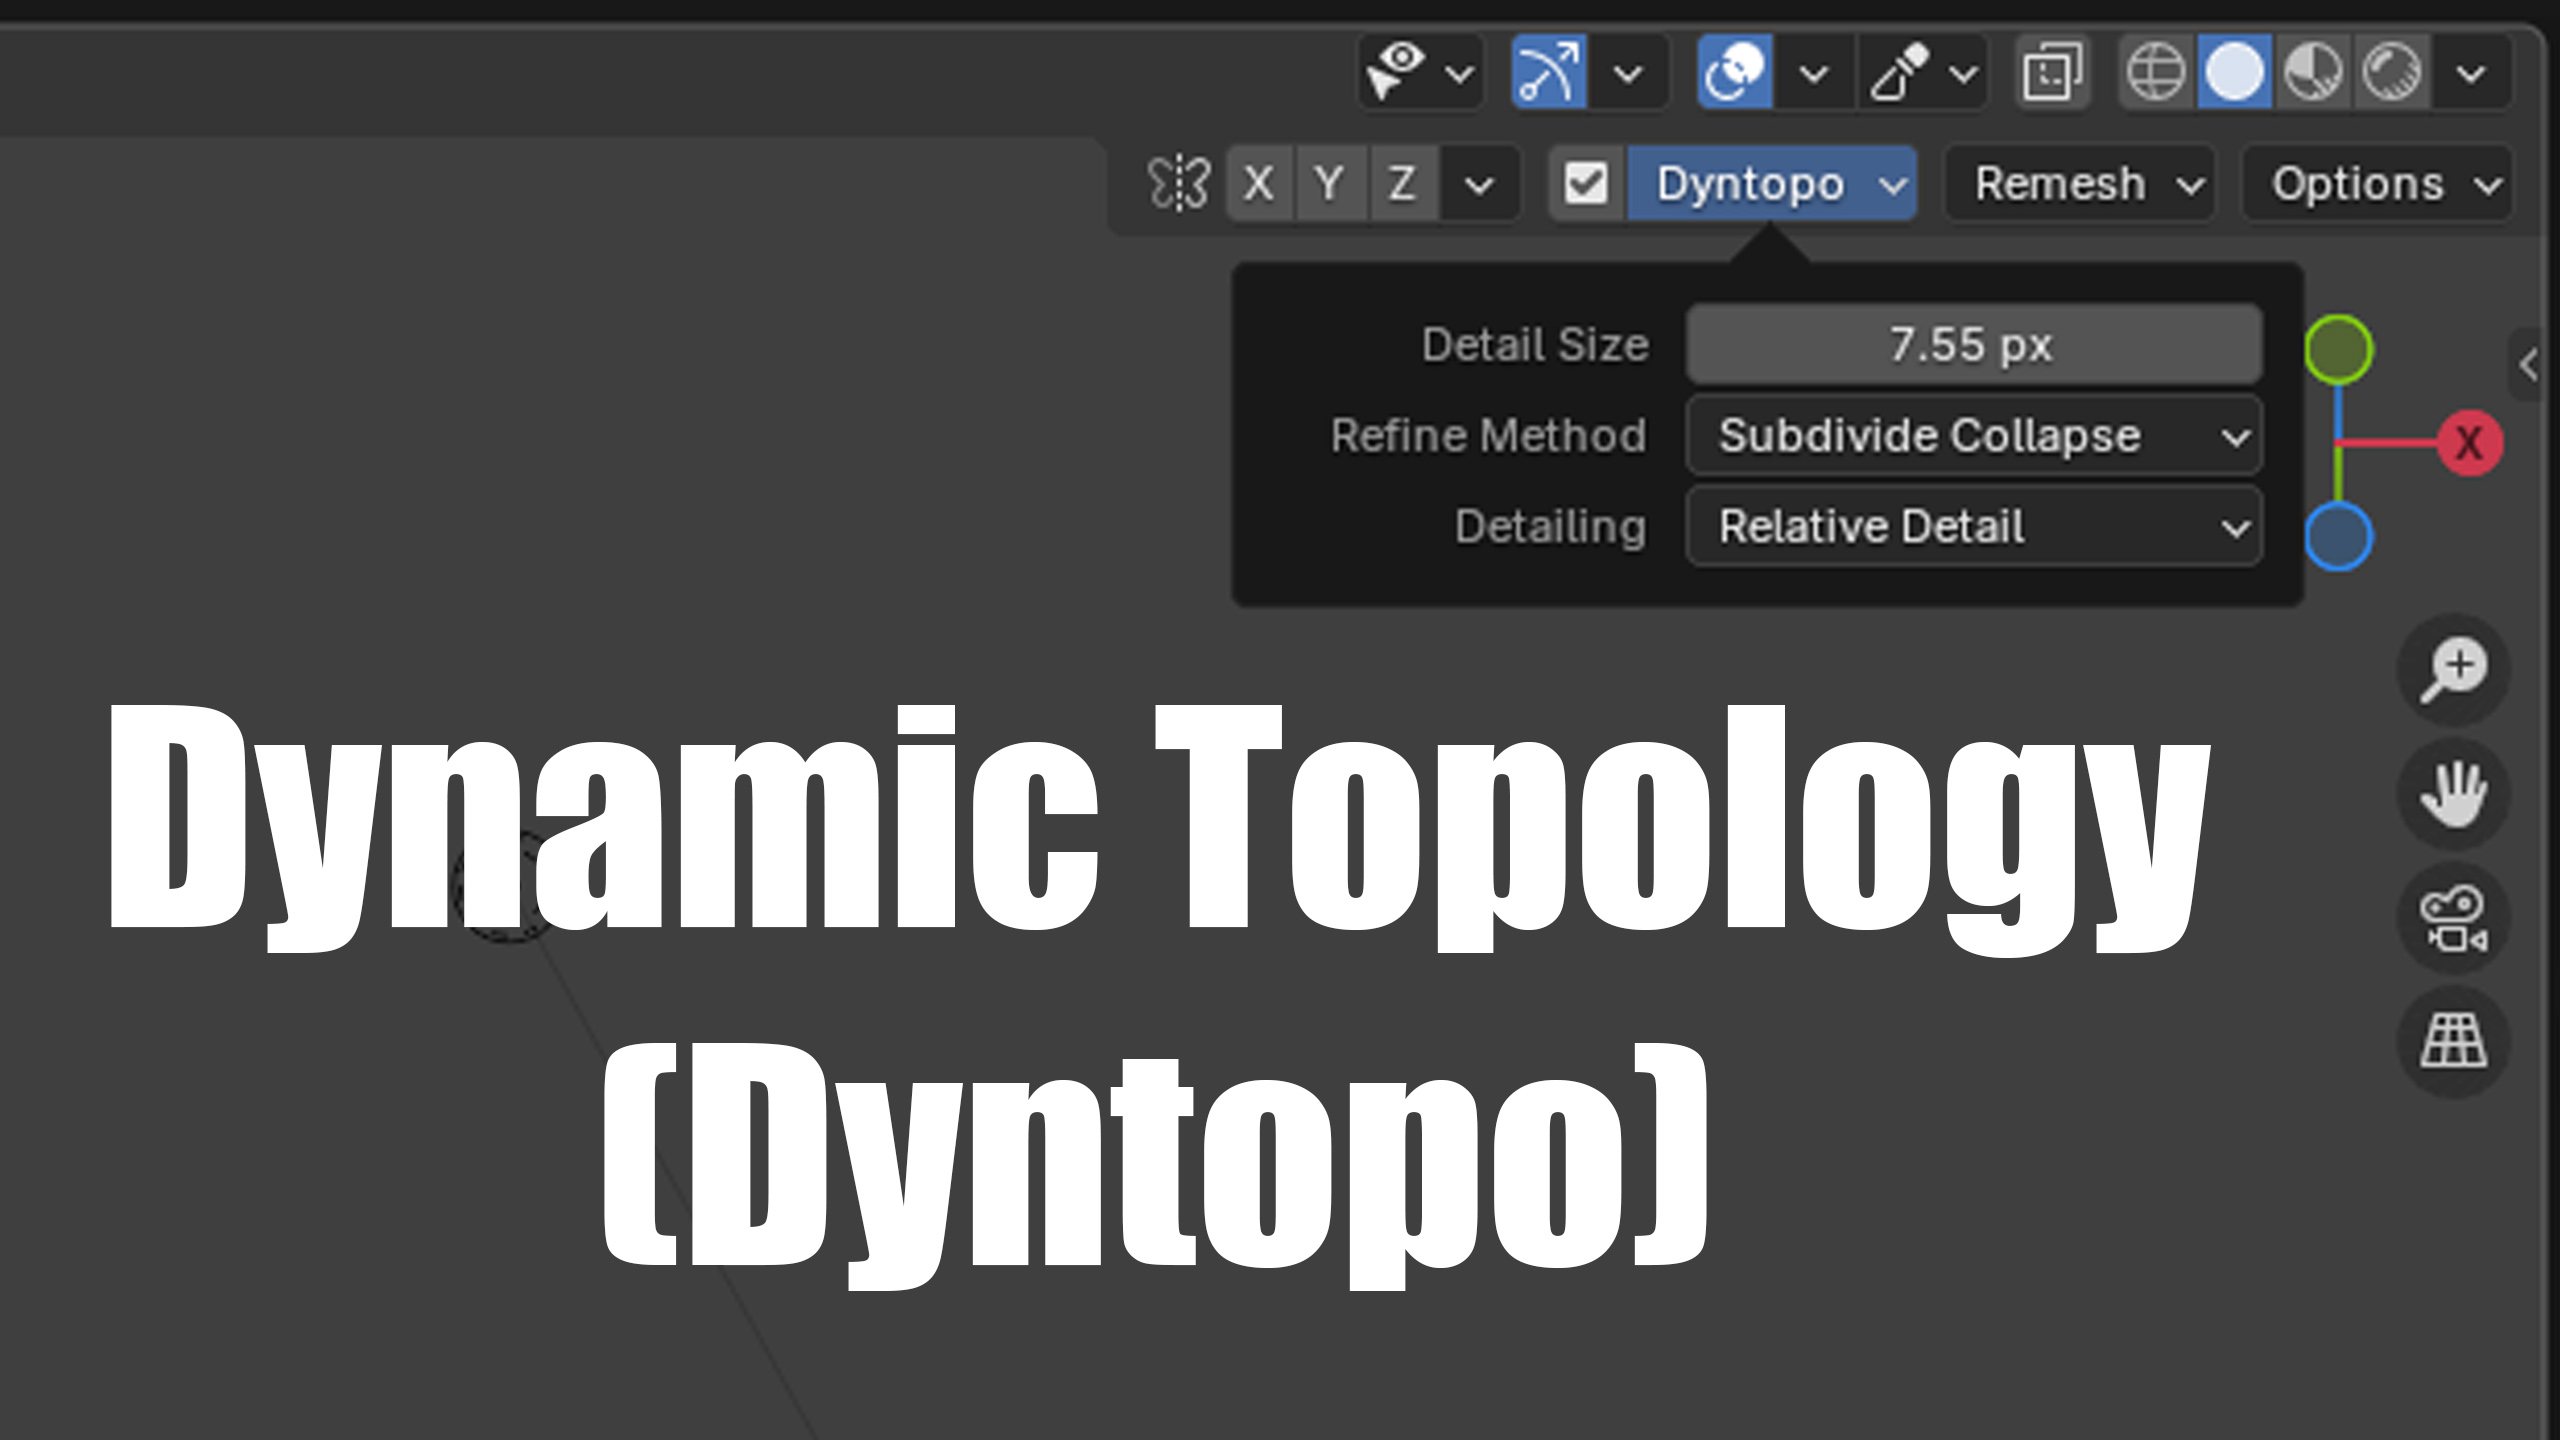
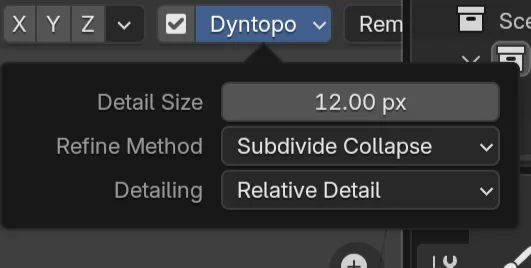
The downside is performance. Dyntopo can create uneven topology that is harder to manage, and the density can explode quickly if you use a small detail size too early. It also makes it harder to use some modifiers later. Dyntopo is a powerful tool, but you need to control it with discipline.
Why Dyntopo slows Blender down: every stroke recalculates local topology on the fly, and the topology changes under each stroke. Sculpt over the same area repeatedly with a very small Detail Size and polygon count can climb quickly, especially when the Refine Method is set to subdivide rather than collapse edges.
Voxel Remesh
Voxel Remesh rebuilds the entire mesh into evenly distributed polygons. This is great for base shapes and early blockouts because it creates a clean, even surface. Voxel Remesh is also more predictable than Dyntopo, which makes it easier for beginners to understand.
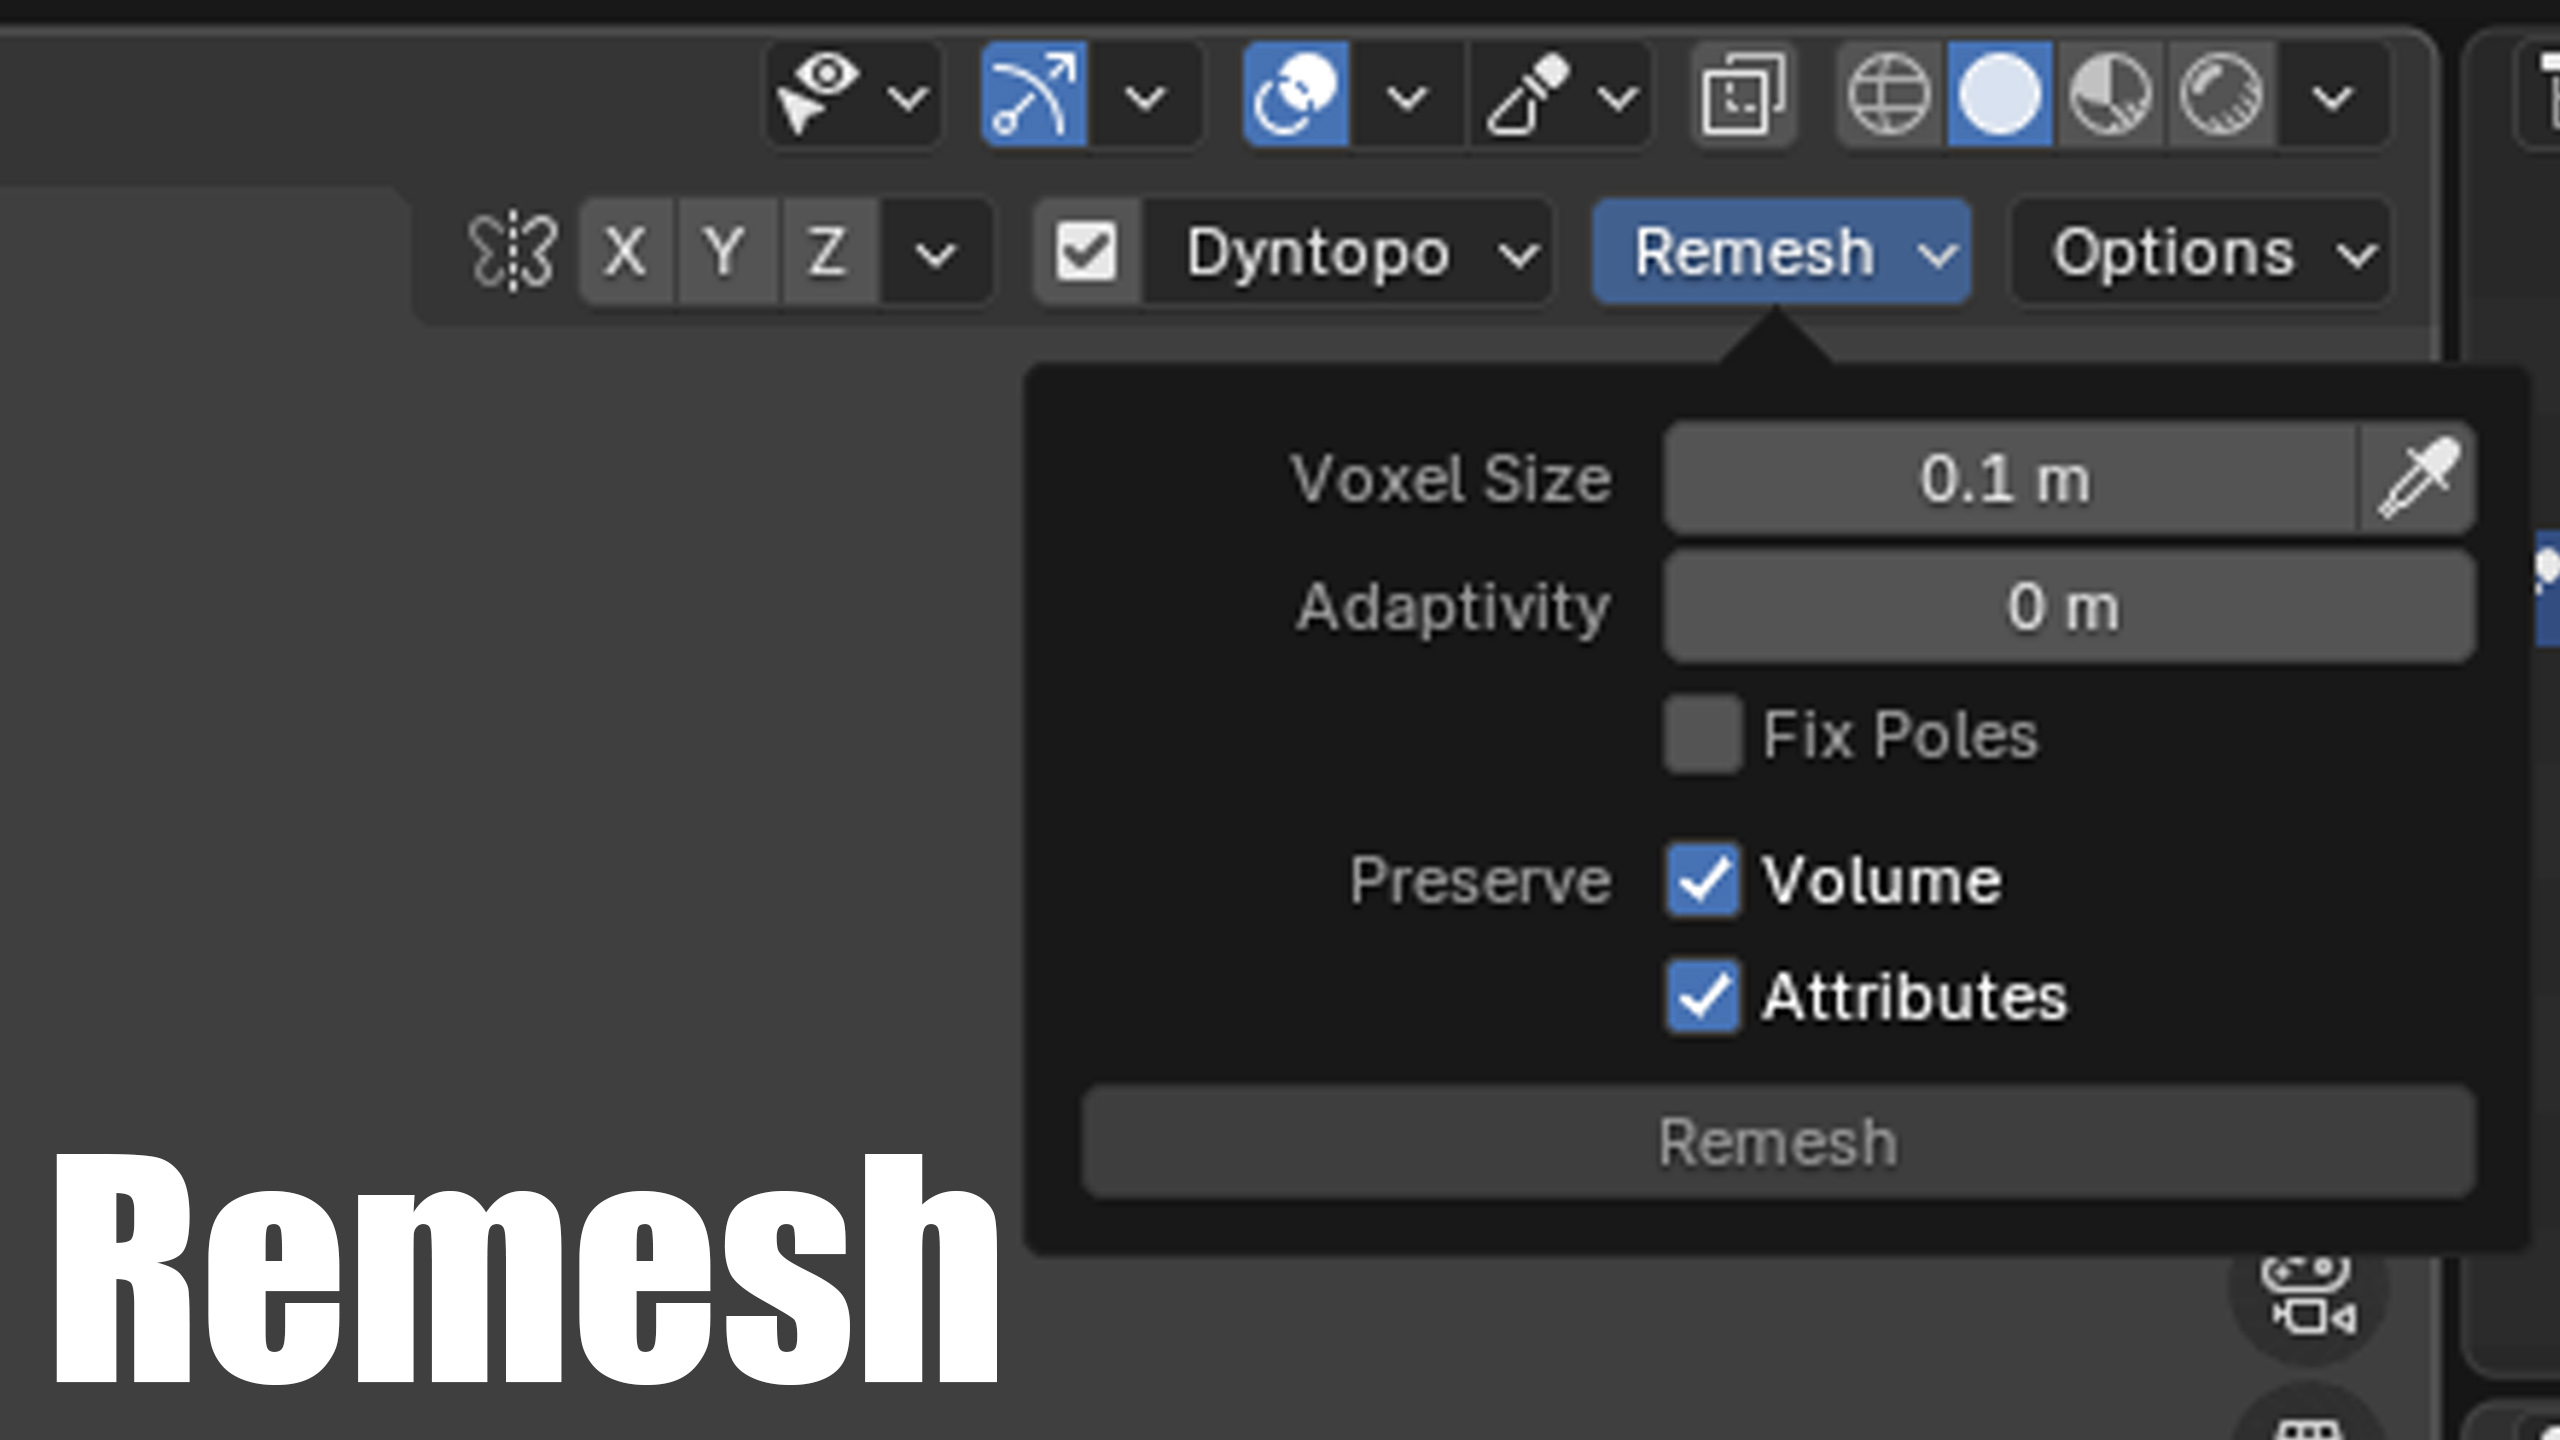
The main drawback is that Voxel Remesh can destroy small details. Every remesh pass recalculates the mesh, which can soften or remove fine features. For this reason, use Voxel Remesh in the early stages and switch to Dyntopo or a higher resolution only after your major forms are correct.
Why Voxel Remesh erases detail: it rebuilds the surface from a voxel grid at the size you set, so any feature smaller than that voxel size gets averaged away in the rebuild. A crease or pore that is finer than your Voxel Size simply cannot survive the pass. Lower the voxel size before remeshing a detailed sculpt, or remesh before you add the fine detail in the first place.
How to stop Voxel Remesh from connecting fingers
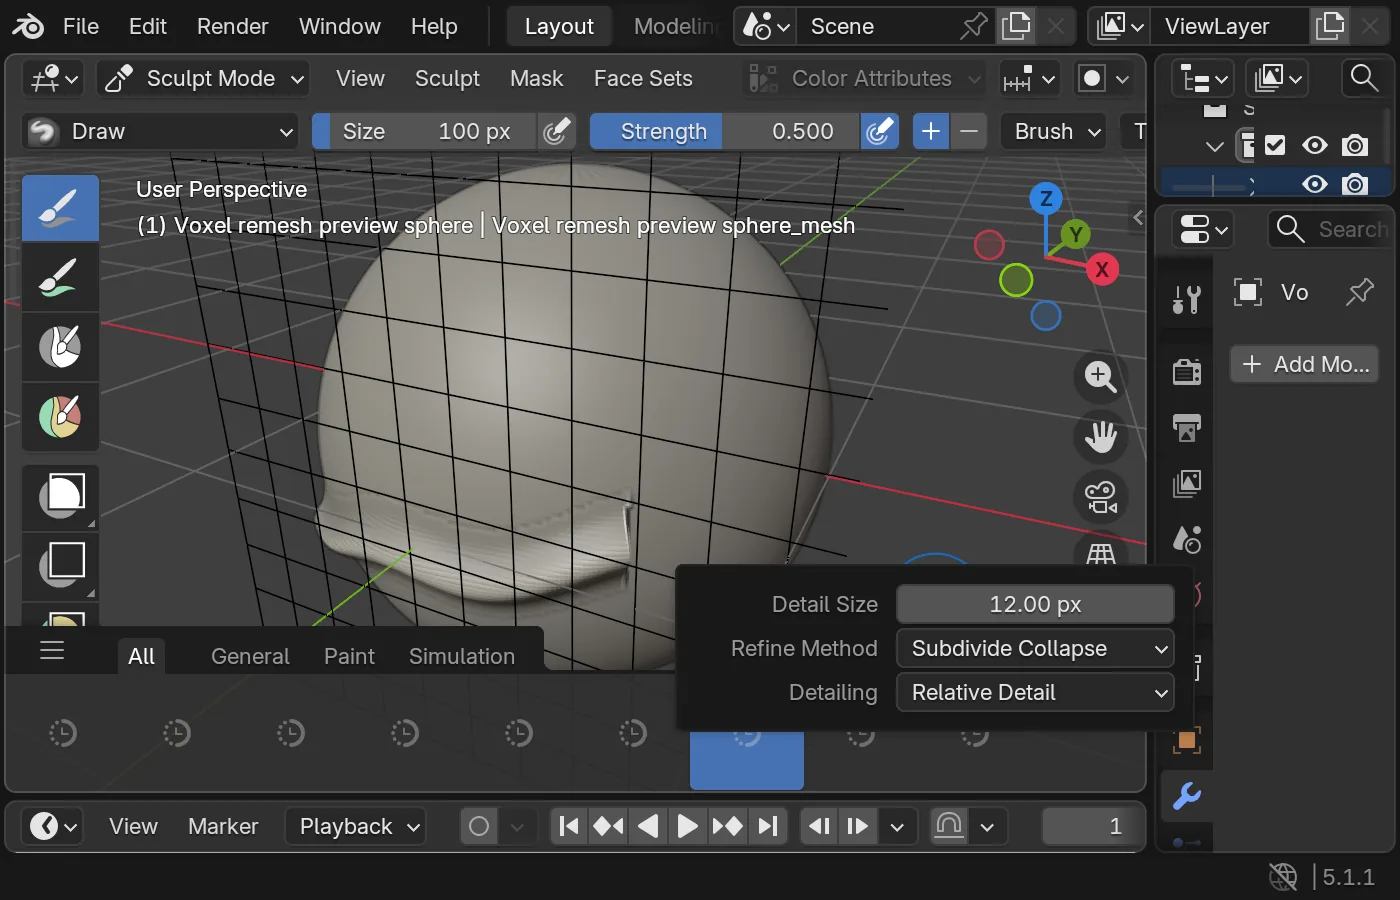
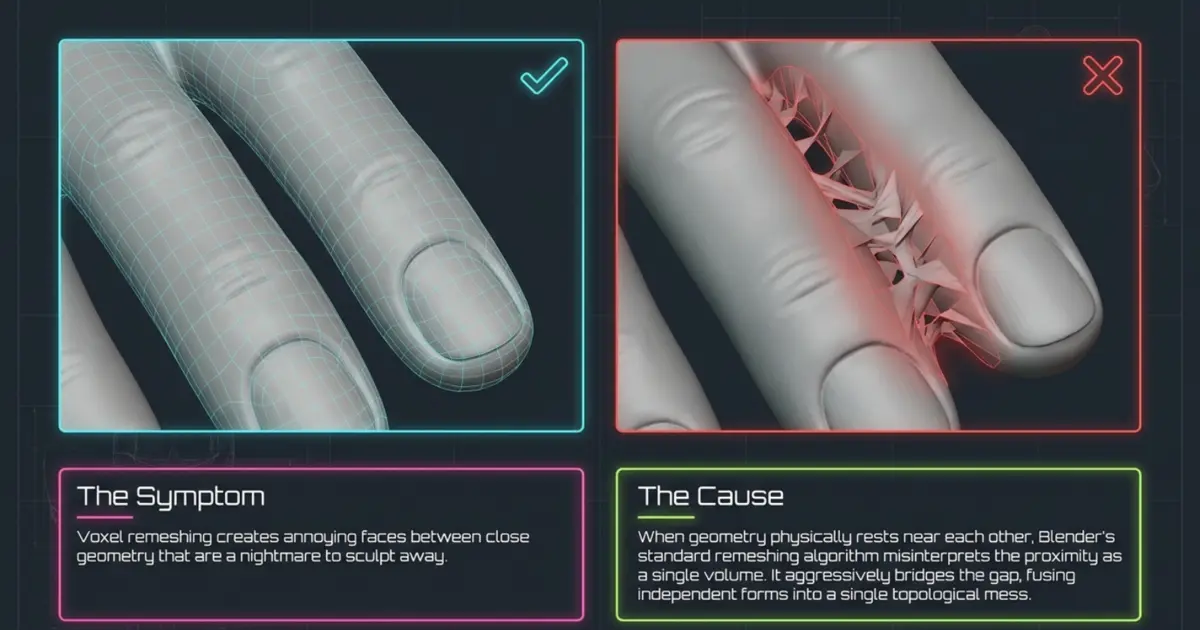
Voxel Remesh creates webbing when the gap between two surfaces is too small for the current voxel grid. The remesher interprets both sides as part of one continuous volume, rebuilds the surface and closes the space. This is expected behavior, not a random topology error.
1. Apply object scale before choosing Voxel Size
In Object Mode, use Ctrl + A → Scale before testing the remesh. A non-applied or non-uniform scale makes it harder to judge how the object and voxel grid relate. Return to Sculpt Mode, press R to preview the voxel size, and make sure the cells are clearly smaller than the narrowest gap you want to preserve.
2. Increase the physical gap between the fingers
The safest fix is geometric: move the fingers farther apart before remeshing. Use a neutral hand pose with visible air between every finger, especially near the fingertips and first joints. Check the hand from the palm, back and fingertip views because a gap that looks open from one angle may still intersect in depth.
If the pose is already approved, duplicate the sculpt before moving anything. Remesh the safer duplicate, then restore the intended pose later during retopology, rigging or projection.
3. Lower Voxel Size only as far as necessary
A smaller Voxel Size creates a finer grid and can preserve narrow spaces, but it also increases polygon count and memory use across the entire object. Reduce the value in steps, preview the grid with R, run Ctrl + R, and inspect the gaps before going finer. If the remesh still closes the fingers, do not keep multiplying the resolution indefinitely—change the pose or isolate the parts.
4. Use Face Sets for control, not as a collision barrier
Face Sets are Blender's Sculpt Mode regions, similar in purpose to polygroups in ZBrush. Choose Draw Face Sets and assign each finger a distinct set so you can identify, hide, mask and edit them independently.
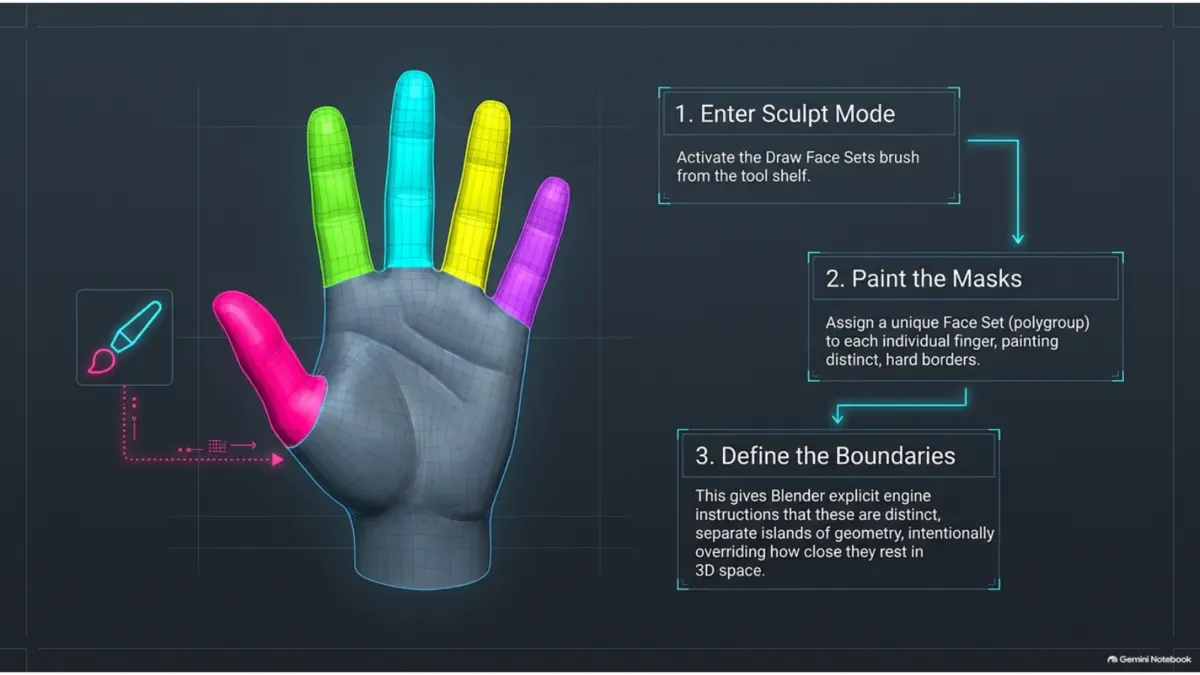
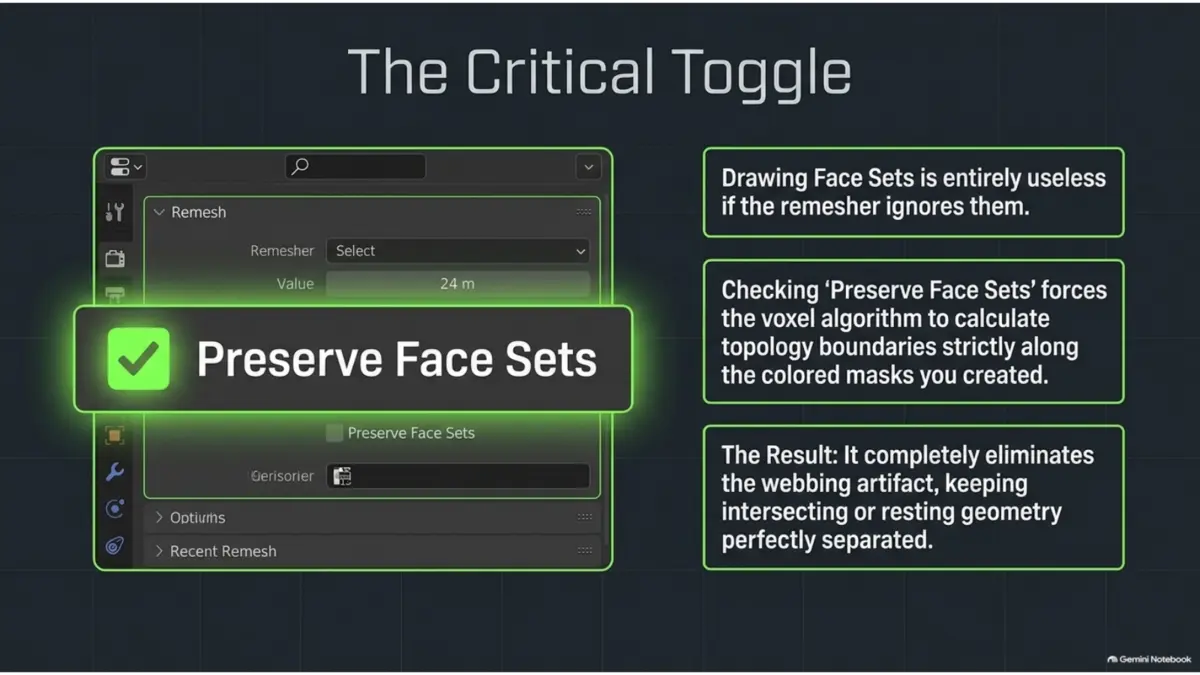
In the Sculpt Mode Remesh settings, enable Face Sets (often described as preserving Face Sets). According to the Blender manual, this option reprojects Face Sets onto the new mesh. It preserves the labels after remeshing; it does not force the voxelizer to keep nearby surfaces apart.
5. Separate difficult parts and remesh them independently
When the hand is too dense or the gaps are extremely narrow, separate the fingers or hand components into temporary objects. In Edit Mode, select a connected part with L, press P and choose Selection. Remesh each object at an appropriate resolution, then reconnect only the finger bases to the palm with a controlled Boolean Union or a final localized rebuild.
Do not run a coarse final Voxel Remesh over the entire hand after this repair; that can recreate the same bridge. Keep enough space around the fingers and use a sufficiently fine final voxel size.
6. Switch to Dyntopo when a global rebuild is unnecessary
Dyntopo changes topology under the brush rather than reconstructing the entire object from a uniform voxel volume. It is often the better choice for refining knuckles, nail beds and narrow finger gaps after the major hand forms are stable. Use a controlled Detail Size and avoid brushing across two close surfaces in one stroke.
Blender 5.2 LTS: remeshing and Dyntopo changes
Blender 5.2 LTS keeps the same core division: Voxel Remesh is the global rebuild tool for blocking and primary forms, while Dynamic Topology is the local tool for changing detail under the brush. In 5.2, the voxel remesher interpolates vertex and corner attributes such as color instead of simply taking the nearest original value. Enabling Dyntopo, or returning to Sculpt Mode with Dyntopo previously enabled, also no longer requires the former confirmation step.
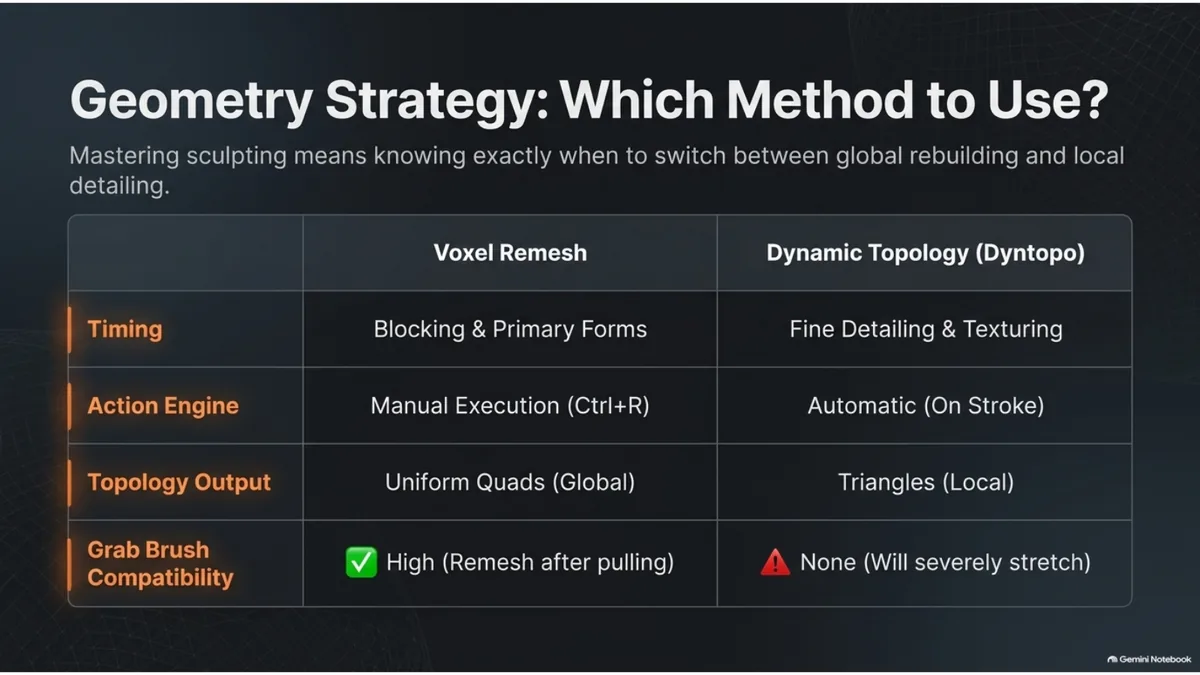
Use the Voxel Remesh pass when the sculpt needs a clean, uniform base again. Use Dyntopo only when you need extra resolution exactly under the brush stroke. This keeps the article focused on mesh-density decisions, not on beginner sculpting as a whole.
When to use Dyntopo vs Remesh
The simplest rule is: base shapes with Remesh, details with Dyntopo. Start your sculpt with Voxel Remesh to establish the big forms. Once the silhouette is solid and you need surface detail, switch to Dyntopo for localized sculpting. If you find your mesh getting messy, remesh again to clean it up.
Many professionals alternate. They block out with Remesh, add mid level detail with Dyntopo, then do a final remesh at a higher resolution before polishing. This creates a clean mesh without sacrificing the freedom of sculpting. It is the best of both worlds, especially for character work.
Concrete settings for blockout, secondary forms, and fine detail
A good dyntopo Blender tutorial always ties settings to the stage you're at, not a single fixed number. Use these starting points and adjust from there based on your model's real-world scale.
| Stage | Tool | Starting value | Why |
|---|---|---|---|
| Blockout | Voxel Remesh | Larger voxel size (coarse) | Fast, even base mesh to establish silhouette and proportions |
| Secondary forms | Dyntopo | Medium Detail Size | Enough density for muscles, folds, and major transitions without exploding polycount |
| Fine detail | Dyntopo | Small Detail Size, used locally | Adds density only where pores, wrinkles, or cuts need it |
| Cleanup pass | Voxel Remesh | Smaller voxel size than blockout | Unifies topology after detail work, before export or baking |
If Blender slows down, increase the detail size or remesh to a lower resolution. Always adjust your settings based on the stage of your sculpt, not just because you want more detail.
Recommendations for low-spec computers
On weaker hardware, the density explosion from Dyntopo hurts far more than on a fast machine. A few habits keep sculpting responsive even on a modest GPU or laptop.
Practical workflow tips
Save versions before major remesh operations. This gives you a safety net if your sculpt loses too much detail. Keep an eye on your polygon count and do not hesitate to reduce resolution while you are blocking forms. You can always increase later.
A mask does not prevent Voxel Remesh from rebuilding the underlying topology. For areas that must remain geometrically untouched, keep a protected duplicate or separate them into another object before remeshing. This gives you a reliable source for projection if the new mesh loses detail.
Understanding voxel remesh Blender settings will make your sculpts cleaner and easier to manage. Once you know the difference between these tools, your sculpting workflow will feel faster and more predictable.
Common beginner mistakes
FAQ
Should I use Dyntopo or Voxel Remesh first?
Voxel Remesh first, to establish a clean, even blockout. Switch to Dyntopo once your silhouette and proportions are correct and you need localized detail.
Why does Dyntopo make Blender slow?
Dyntopo changes topology under the brush, so density can climb quickly when you repeatedly sculpt with a very small Detail Size or a subdivide-focused refine method.
Why does Voxel Remesh delete my sculpted detail?
Voxel Remesh rebuilds the mesh from a voxel grid at your chosen size, so any feature smaller than that voxel size gets averaged away in the rebuild. Use a smaller voxel size, or remesh before adding fine detail.
What Detail Size should I use for Dyntopo?
Start large for blockout and secondary forms, then drop to a small size only for the specific area you're detailing, and raise it back afterward.
Can I use both Dyntopo and Voxel Remesh in the same sculpt?
Yes. A practical workflow is Voxel Remesh for blockout, Dyntopo for localized forms, then retopology or a carefully tested higher-resolution remesh before polishing.
Why does Voxel Remesh connect fingers?
The gap is too narrow for the current voxel grid, so the remesher reads the fingers as one volume and bridges them. Increase the spacing, use a smaller Voxel Size, or remesh temporarily separated objects.
Does Preserve Face Sets prevent fingers from merging?
No. The Face Sets option reprojects Face Set labels onto the new mesh, but it does not create a geometric barrier between close surfaces. Use it to preserve organization while solving webbing through spacing and voxel resolution.
Featured VK GameDev products
These Blender and ZBrush brush packs are optimized for clean strokes at any mesh density. They work well with both Dyntopo and Remesh workflows.

Useful links and official Blender sources
Technical behavior in this update was checked against the Blender 5.2 Remesh manual, the Draw Face Sets manual and the official Blender 5.2 sculpting release notes.
Hotkeys for Blender sculpting · Blender vs ZBrush comparison · Blender sculpting beginner guide
Browse all Blender sculpting brushes · Explore the 3000+ sculpting brushes bundle